Product 3: Platinum Cure Safe 3D Printing Resin for SLA
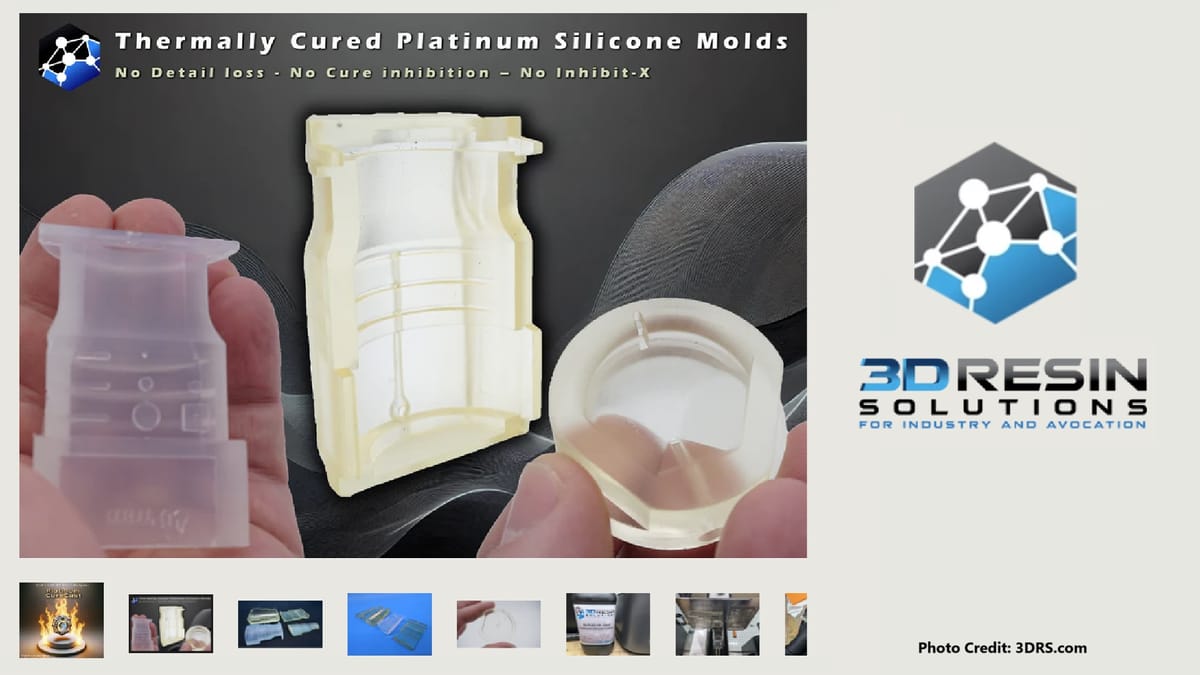
Welcome to a very niche product: A 3d printing resin that is formulated to play nice with platinum cure silicones. I've had a great experience working with Craig at 3D Resin Solutions to get a new resin formulated and curing parameters dialed in!
*Update 12/12/2024 The Resin is now listed for sale here: Platinum Cure Cast - Clear
Here's the context you need to know how unique and useful this is:
Silicone rubber is a high performance material known for it's elasticity and ability to handle exposure to a wide range of temperatures, chemicals, UV radiation, physical manipulations and more. It's robust performance makes it the material of choice for applications from medical devices and aerospace all the way down to household sealants. There are many types of silicone products that each have their own ideal use case based on the specific material properties, geometry and production volume needed. Platinum cure silicone's specifically, can come as a Room Temperature Vulcanizing (RTV) product--as two liquid parts that get mixed together in order to chemically react in a process that cures the material into a solid. If you've used epoxies this is a similar process.
In my company, Prototyping Tech, we've been using platinum cure silicones in conjunction with 3d printing to create molds, prototypes and low volume production parts since the 90's. Since I purchased the business in 2018, our primary use case for silicone has been the production of anatomical fixtures for testing medical devices, such as heart valves.
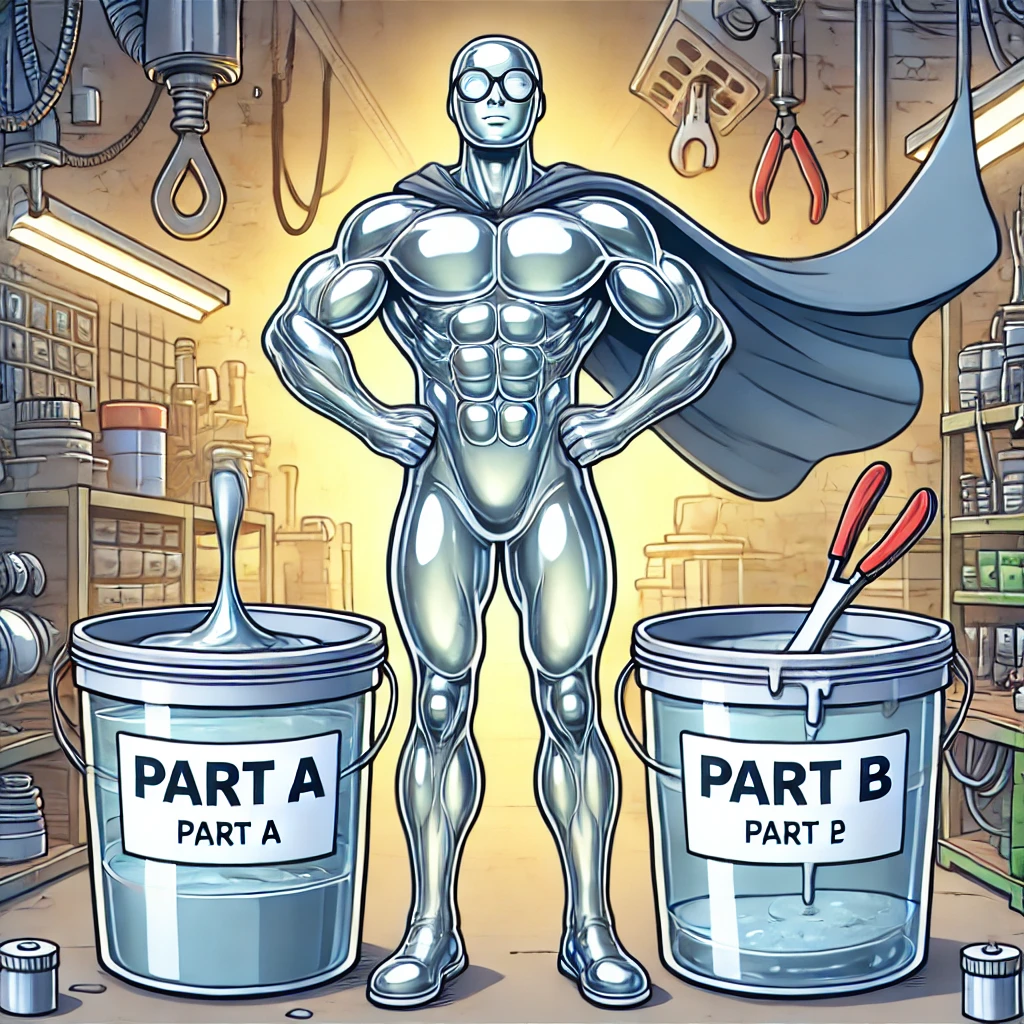
The Problem: Until the silicone is cured into it's inert/crosslinked/solid state, it is sensitive to MANY contaminants. It's like Superman: The mixed silicone needs a private place to change into it's cape before performing all manner of amazing feats of strength and resilience! If there happens to be a contaminant such as sulfur, the powder in latex gloves, unreacted monomers or curing agents in photocurable SLA resins, it hides it's identity by staying a goopy, liquid mess.
My top preference for the 3d printing of patterns and molds is via stereolithography (SLA) because it is high resolution and high precision, giving our molds the accuracy and surface finish needed for the silicone parts we produce. I've found that Accura 25 and Accura 60 resins from 3D Systems do not cause cure inhibition, however, those machines and material eco systems are very expensive (think 6 figures to get in the door) and haven't been a match to have in-house to date. Although I've purchased many patterns printed in Accura resins from production partners over the years, printing in-house can be crucial to hit deadlines and cost targets. When printing whole molds and replacement cores, in-house production often saves hundreds to thousands of dollars on every project.
For that reason, over the last 4 years I've printed molds in the Clear resin on our trusty Formlabs Form3B printer, post cured the components thoroughly, and then every time a mold is used it receives a special preparation with a product called InhibitX (to help the silicone cure without inhibition), and also a coating of mold release, (since the InhibitX will cause the silicone to bond directly to the mold). I exclusively use BJB Materials Silicones due to their superior performance, cost and customer service. I've read and tried MANY types of post processing recommended by manufacturers and in forums:
-Protective coatings such as SEM Clear Coat 13013 can cause build up, reducing the necessary dimensional accuracy of my parts, and also fill in, or not penetrate, fine features.
-Extended curing, curing under water, curing with heat, sitting parts out for days in the sun, etc, have not yielded consistently successful parts for me. And the hours to days of extra time don't work for my business operations.
-Using other silicones that are less sensitive to cure inhibition, such as tin cure, do not provide the exceptionally high performance and lifetime of platinum cure--and also do not meet spec for my medical customers that need consistency for their testing.
In order to address this, a colleague introduced me to Craig Tinerella at Interactive Inks and Coatings. Just over 5 years ago he noticed that the photopolymer competencies and supply base used for the inks and adhesives they produced crosspollinated well with those needed for SLA resins for 3D printing. With that insight he spun out a specialty lab for formulating printing resins now called 3D Resin Solutions! This has been a month of dialing in formulation, printing parameters and post processing of this resin, in collaboration with Craig, and meeting him and visiting his facility in the Chicago area. He's been great to work with and has the bonus experience of having printed an excellently nerdy array of items and characters for his own D&D needs.
When I reached out, they had been working on a resin for this application that I added my special requests to, and they were generous to mix up a custom formulation for this experiment. After this month of testing, with nearly 30 tests, I can say, the resin works!
-It does not cause cure inhibition when post cured properly (20 mins in UV followed by 80 mins in a 275° F oven).
-There is negligible shrinkage through the curing process.
-It performs well without the use of cure inhibition prevention chemicals like InhibitX, and no mold release is needed.
That said my testing is not complete and I'm still in the process of dialing in printing parameters for certain types of fine details and also larger molds. If you have platinum cure silicone use cases and would like to do some testing of this resin, reach out to me and I'll see if I can set you up with some sample resin or printed molds. Your discoveries and feedback could impact the final chemical formulation of the resin!
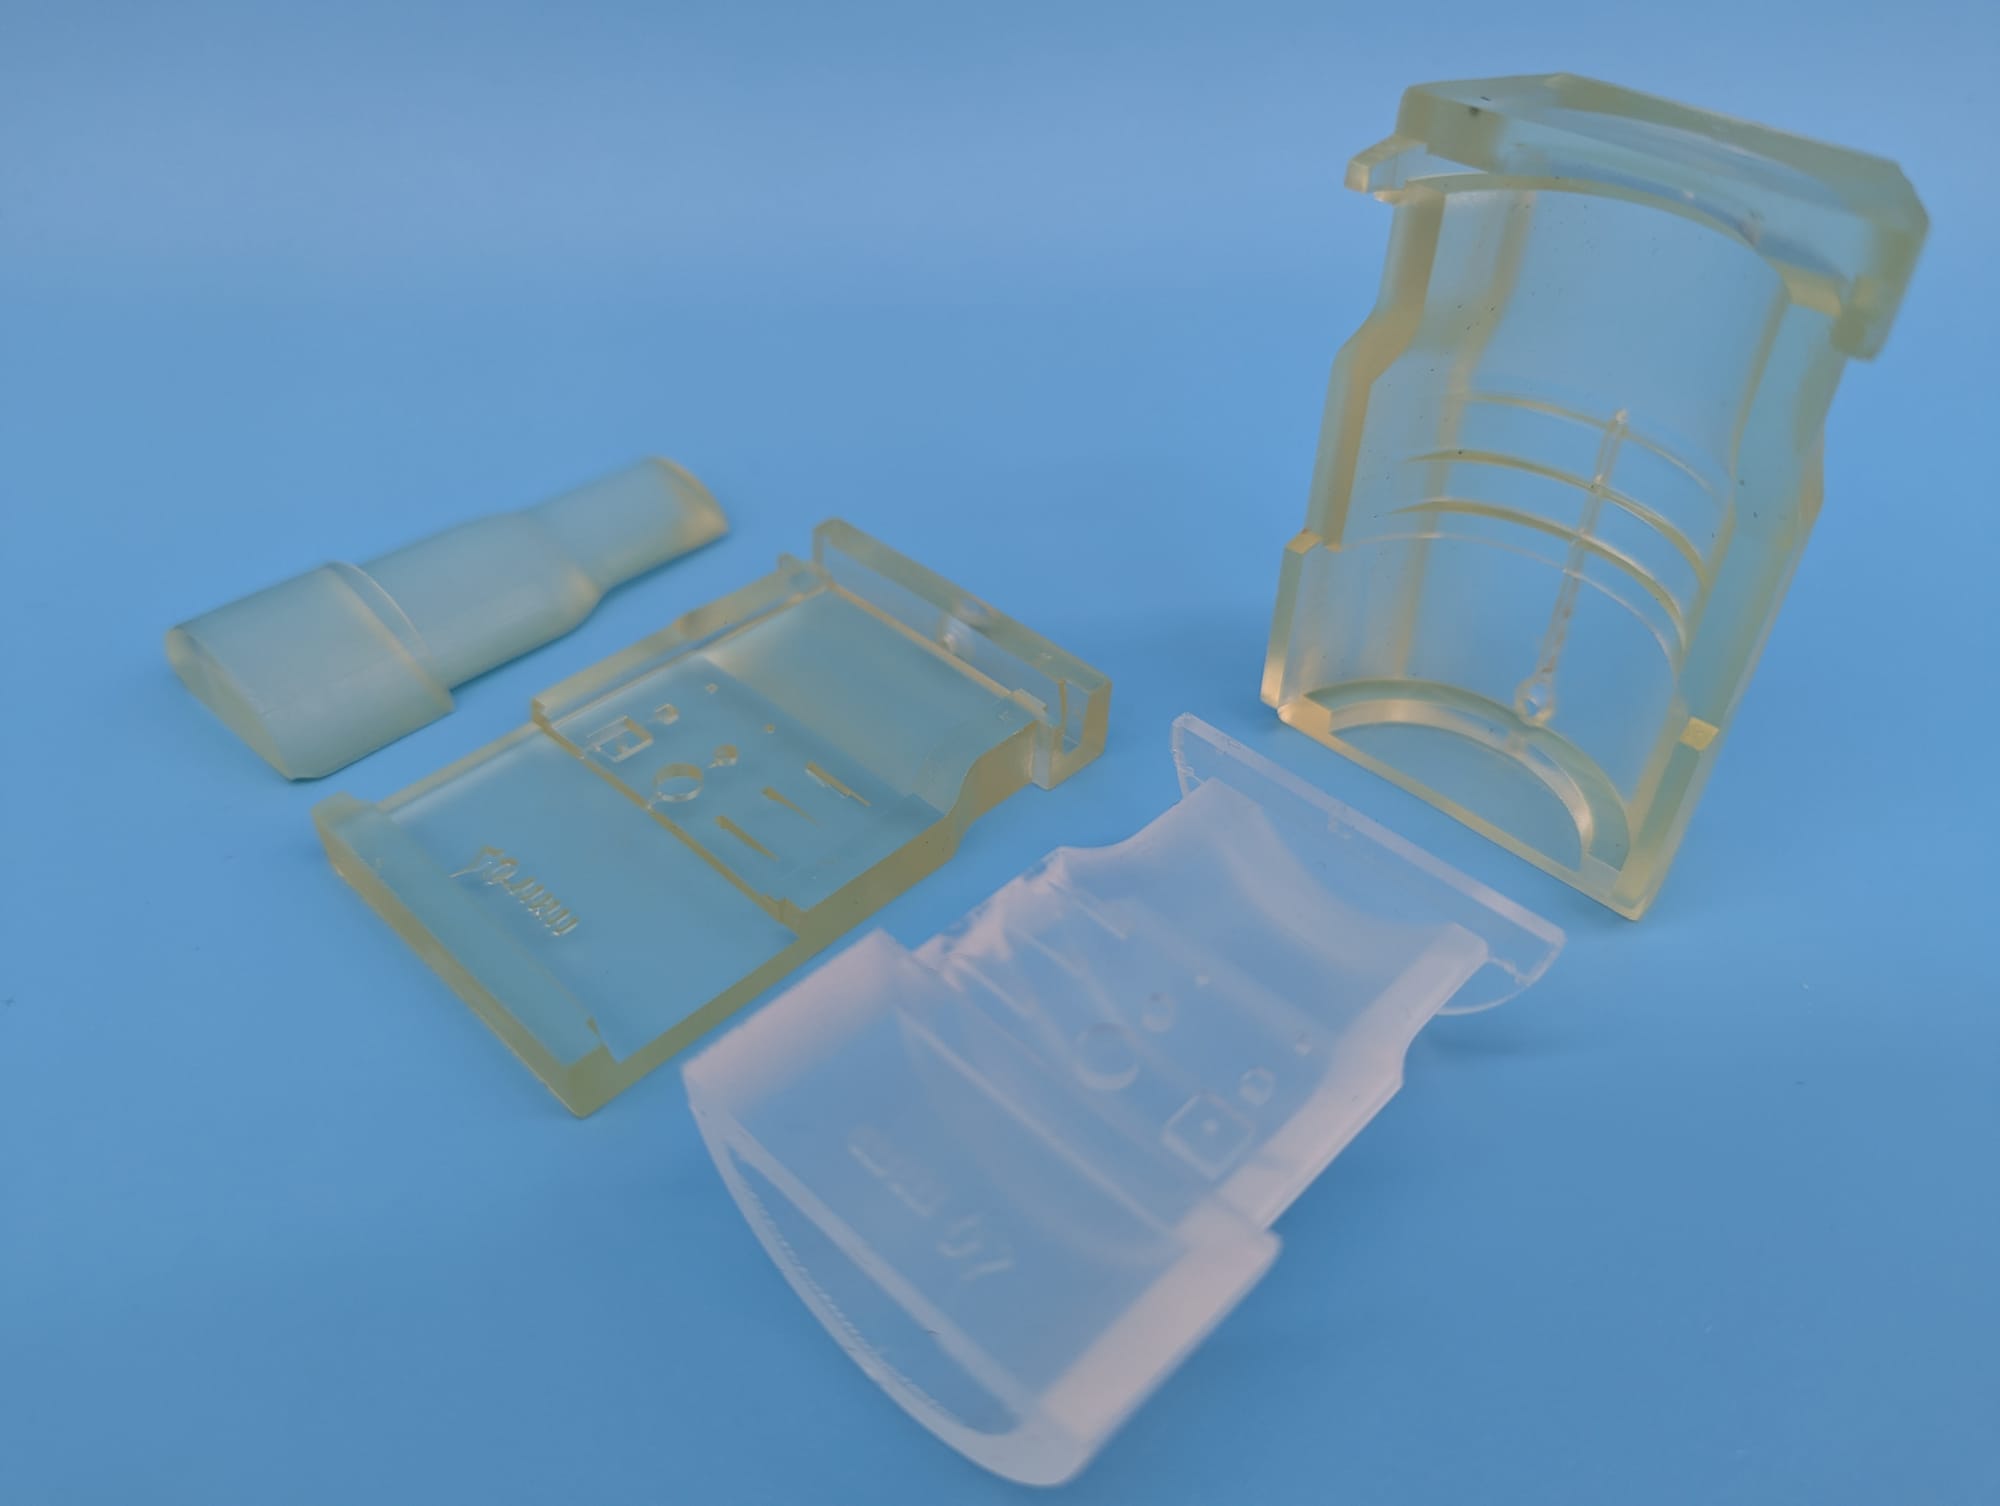
Below is a set of images showing some of the progression this month.
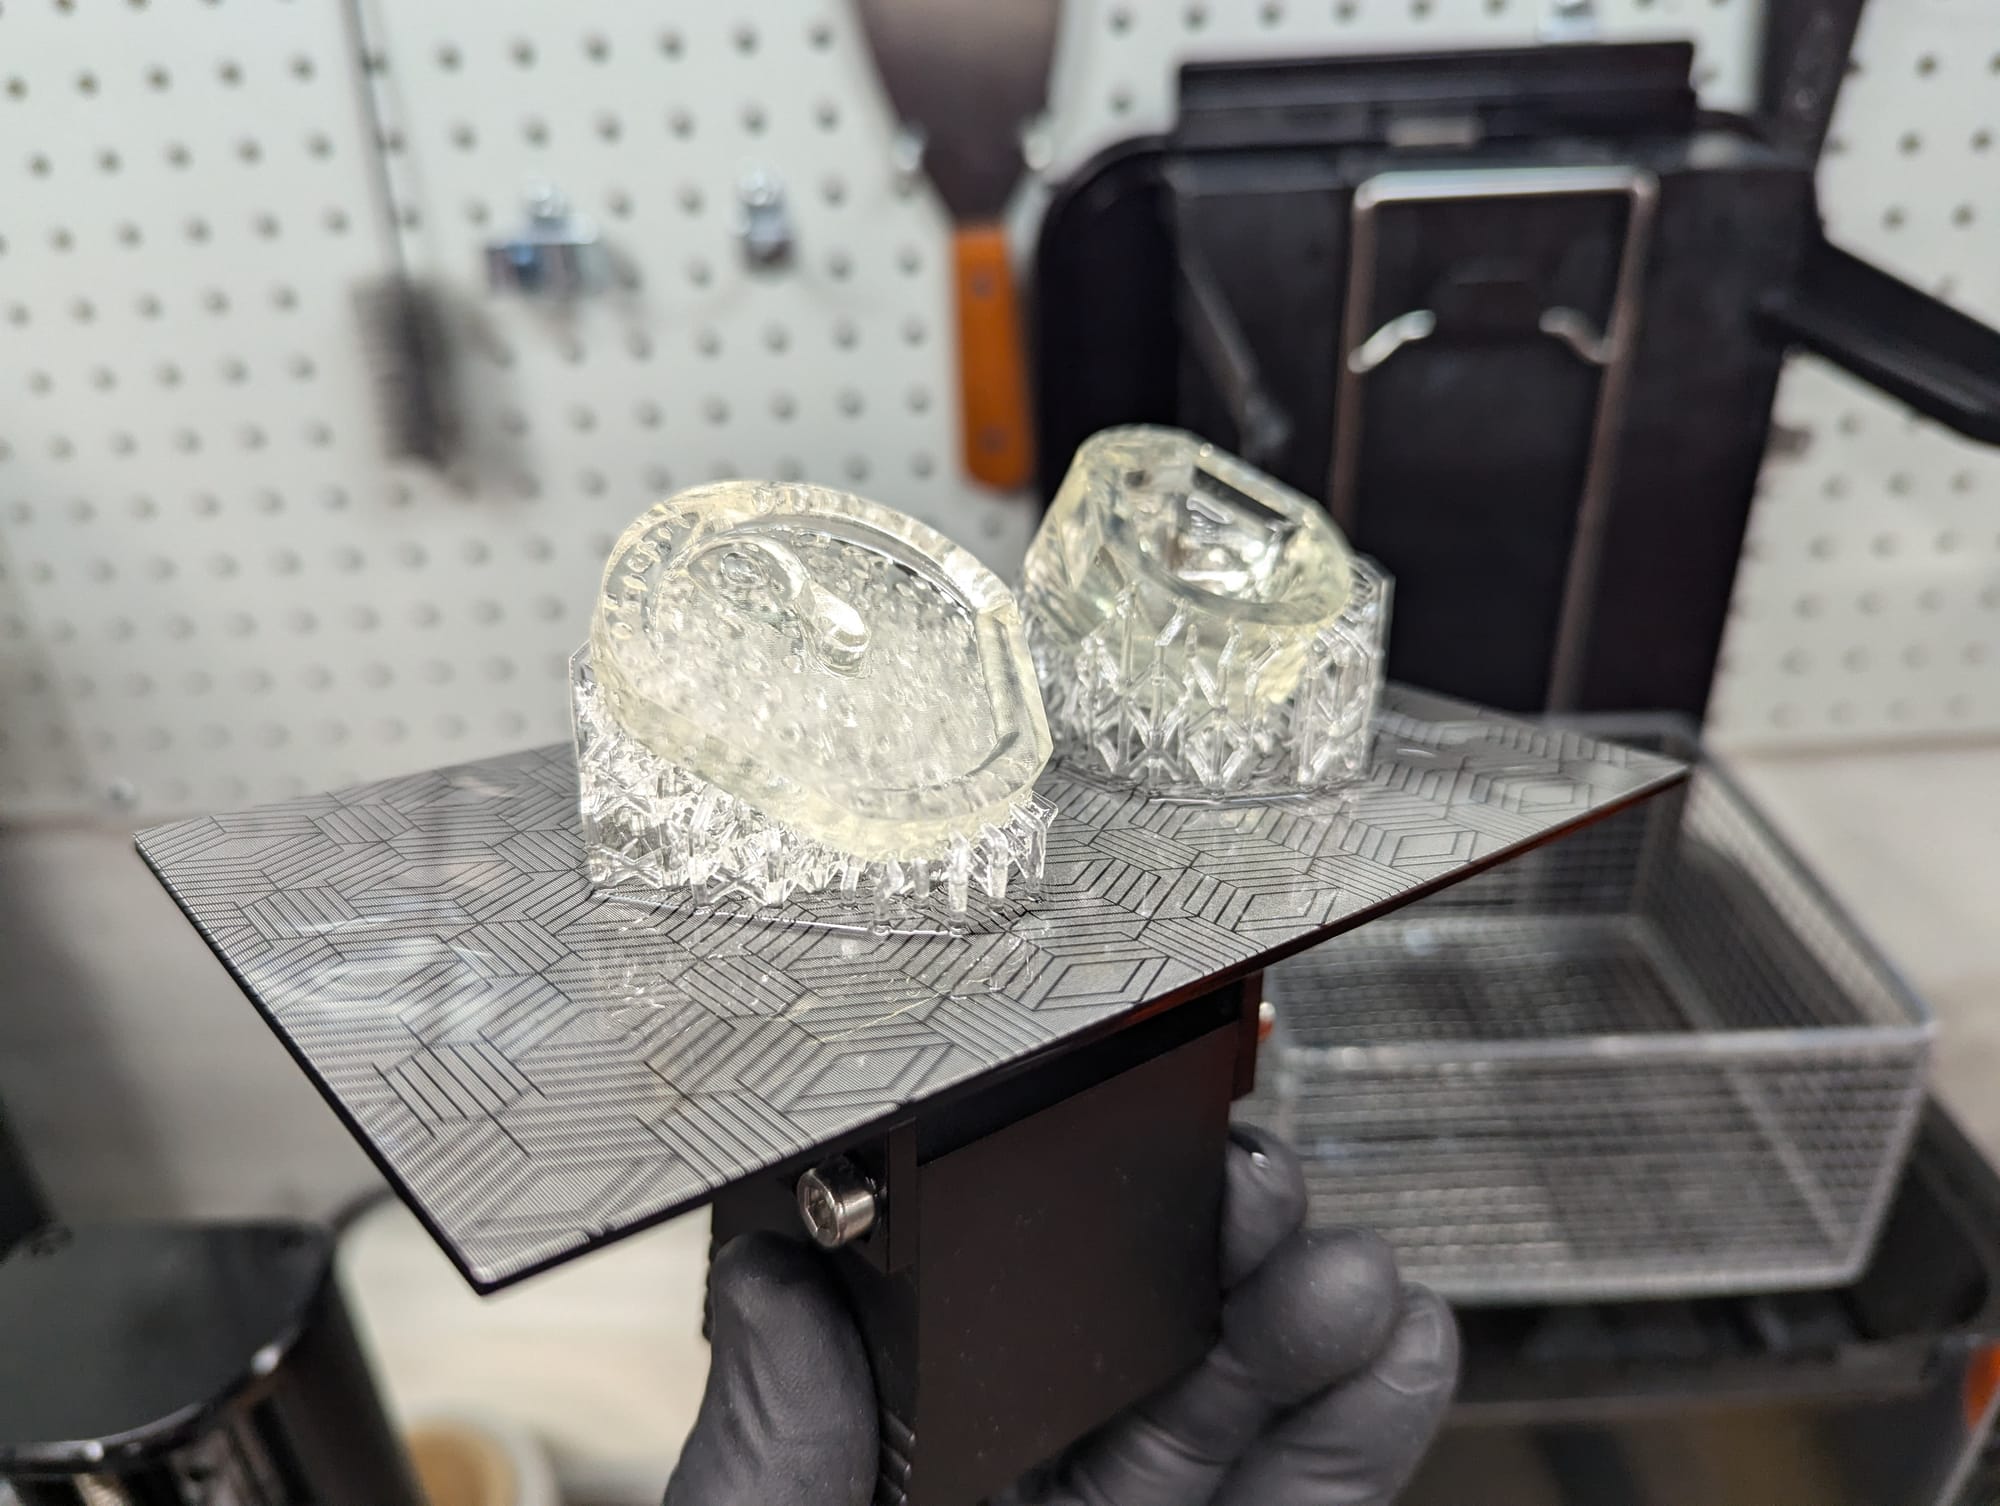

As in my first product of the year, developing the peristaltic pump, documentation and keeping visually similar/identical parts tracked was a crucially important part of the process. For testing projects like this, where I may not know what I don't know, two practices have really helped me:
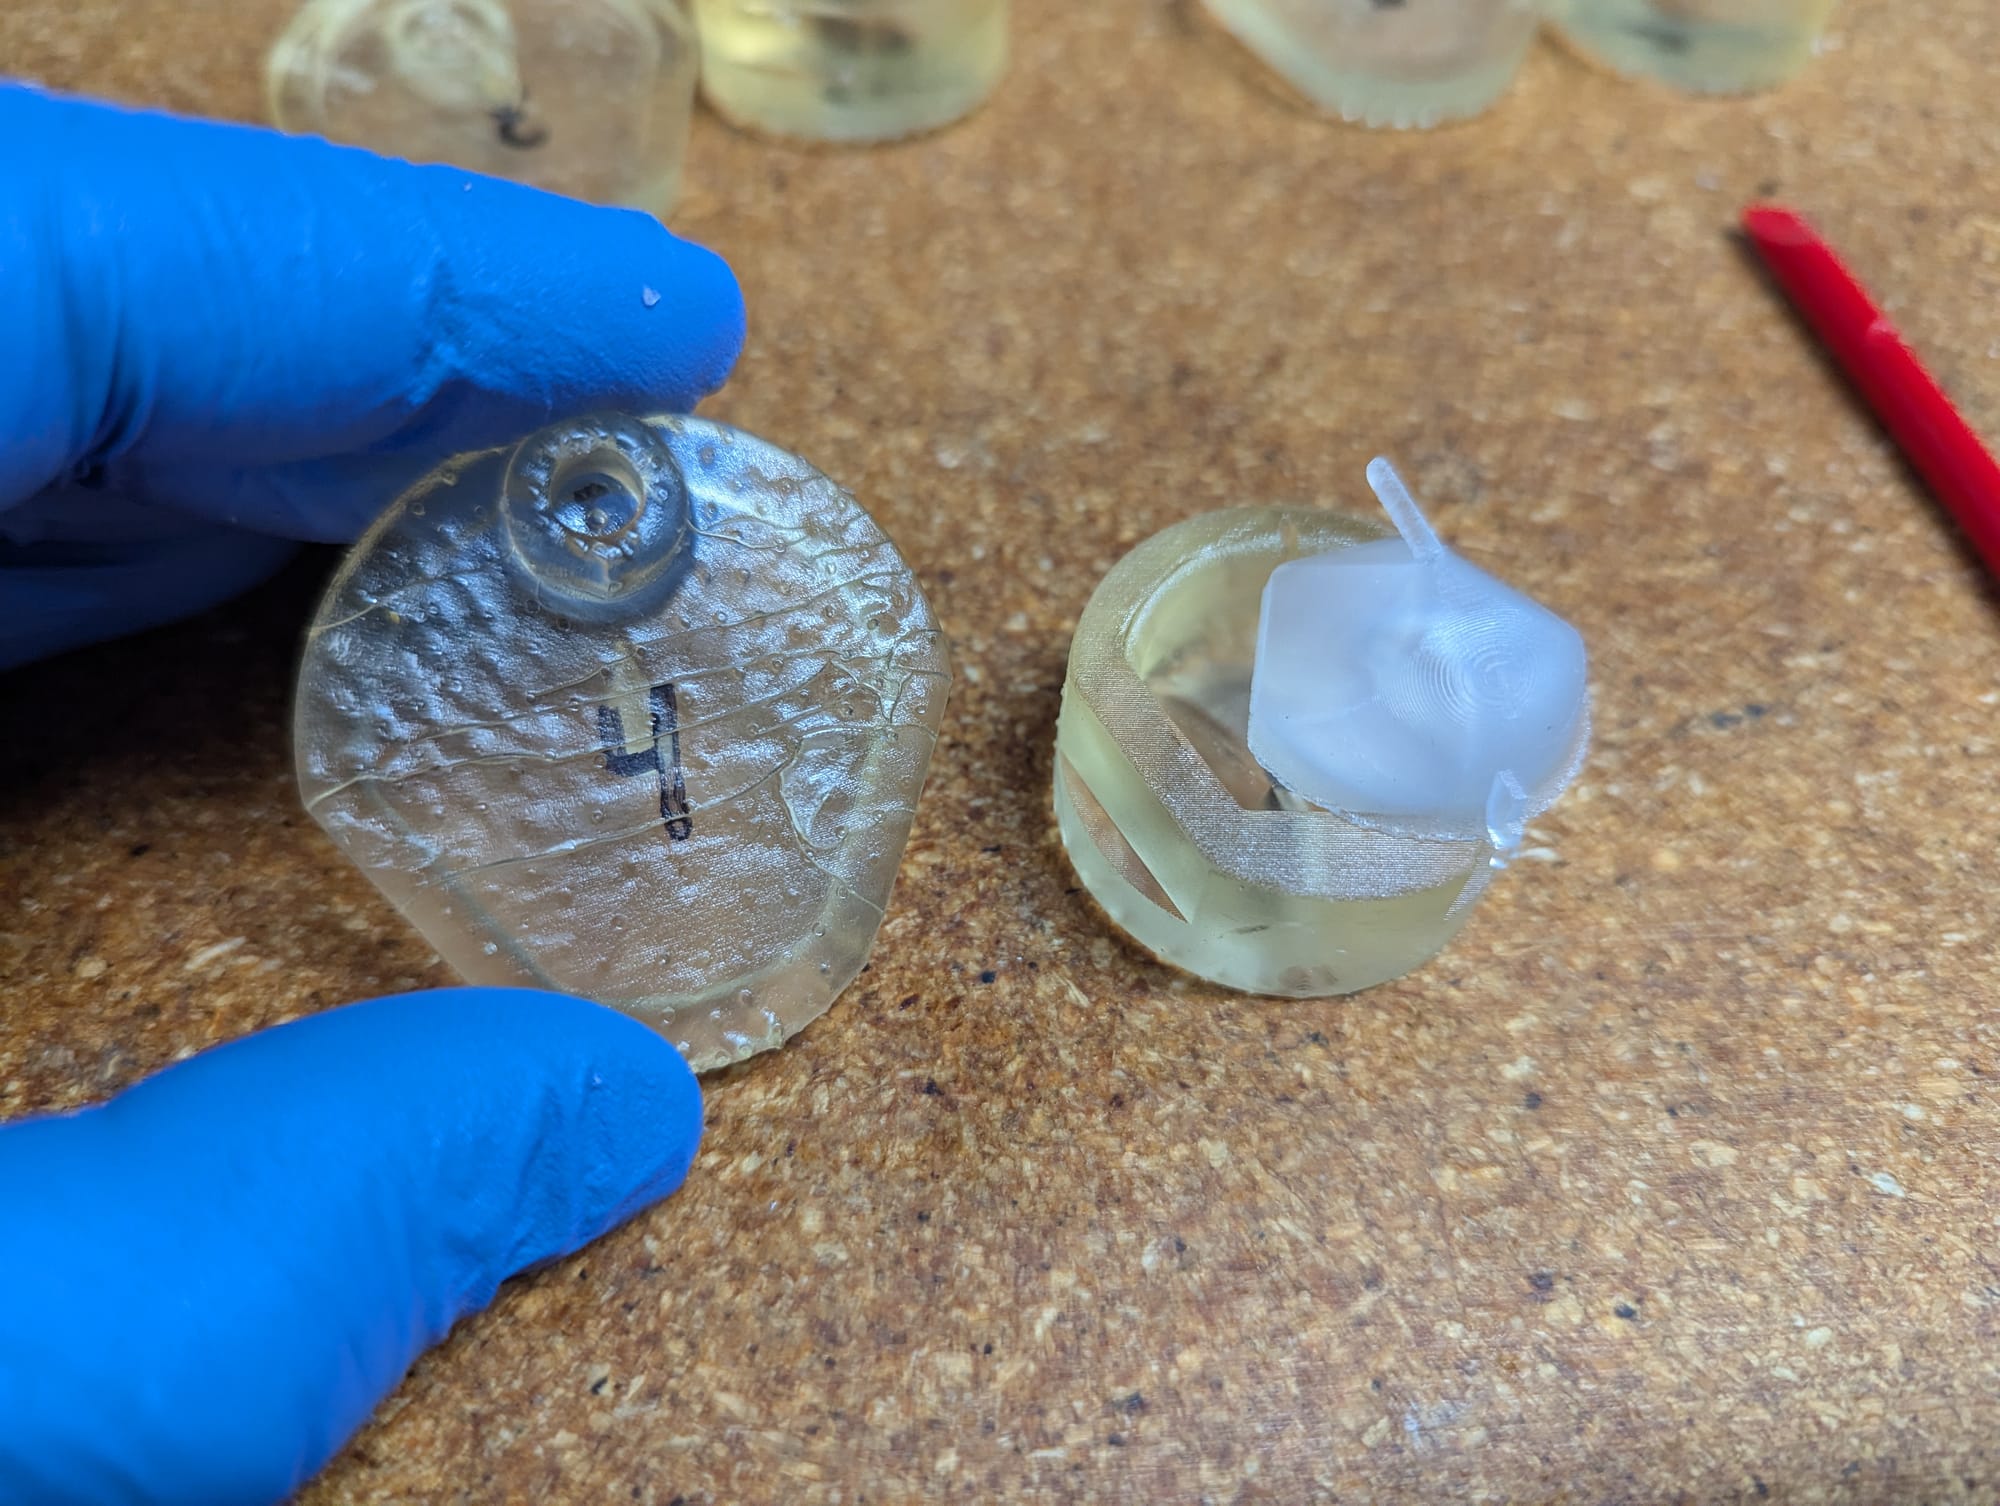
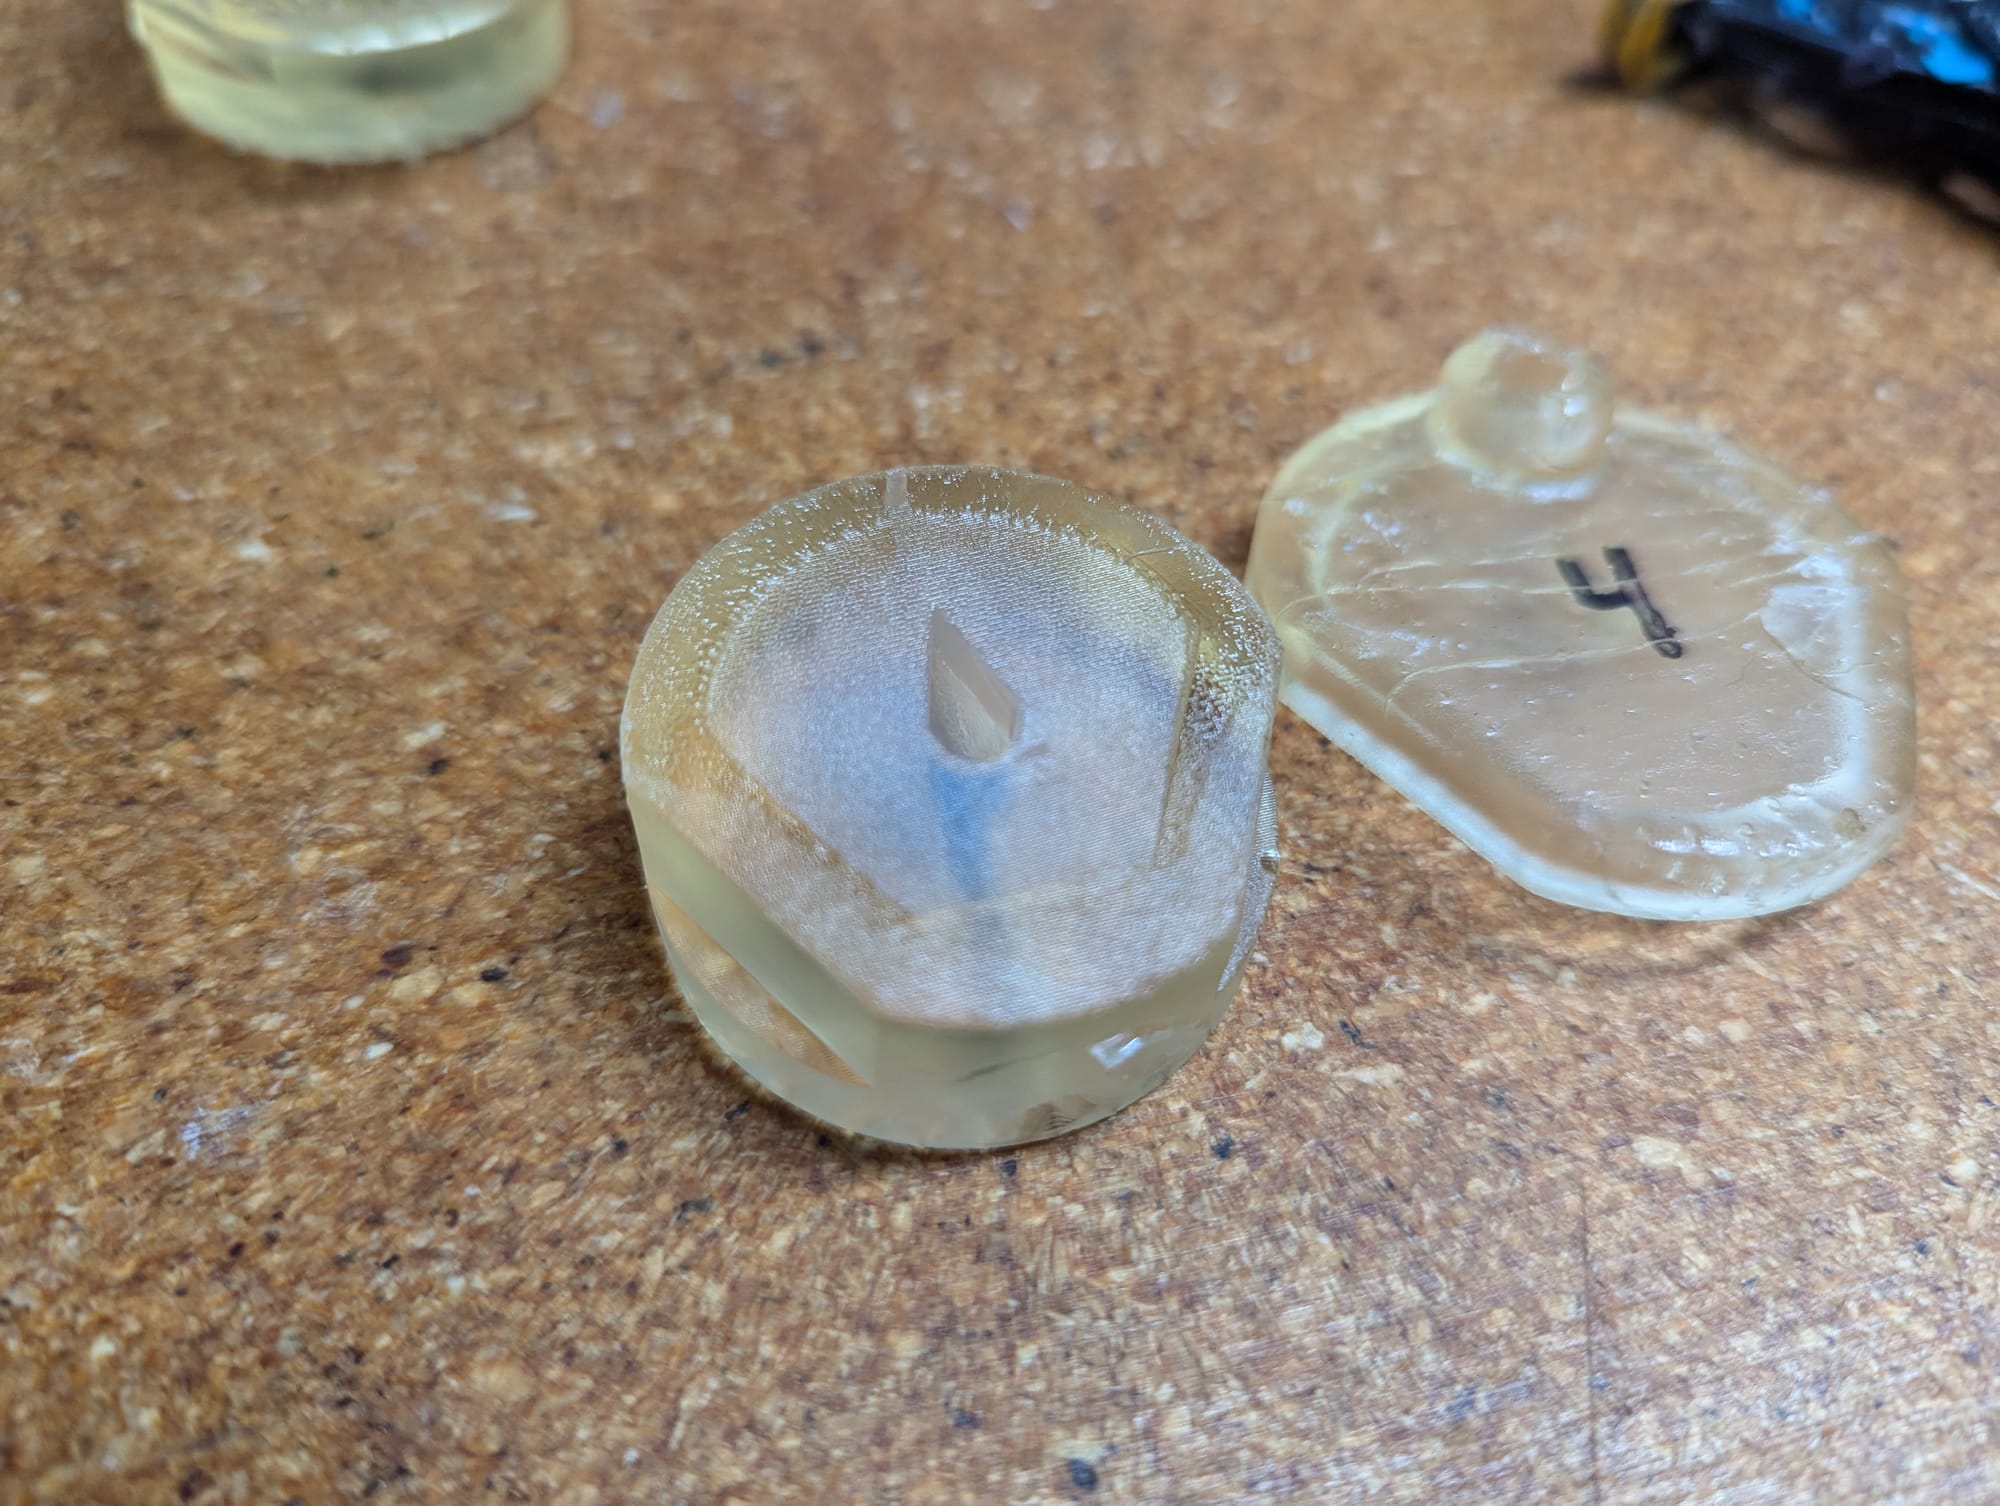
- Take a lot of photos. Photo's take just a moment to create and revisiting them have been a very useful way to accurately remember an older version of a part--especially if it is altered or destroyed through the manufacturing process. I like making a visual mark on the part with a sharpie to be able to ID it in images and when it is physically kept.
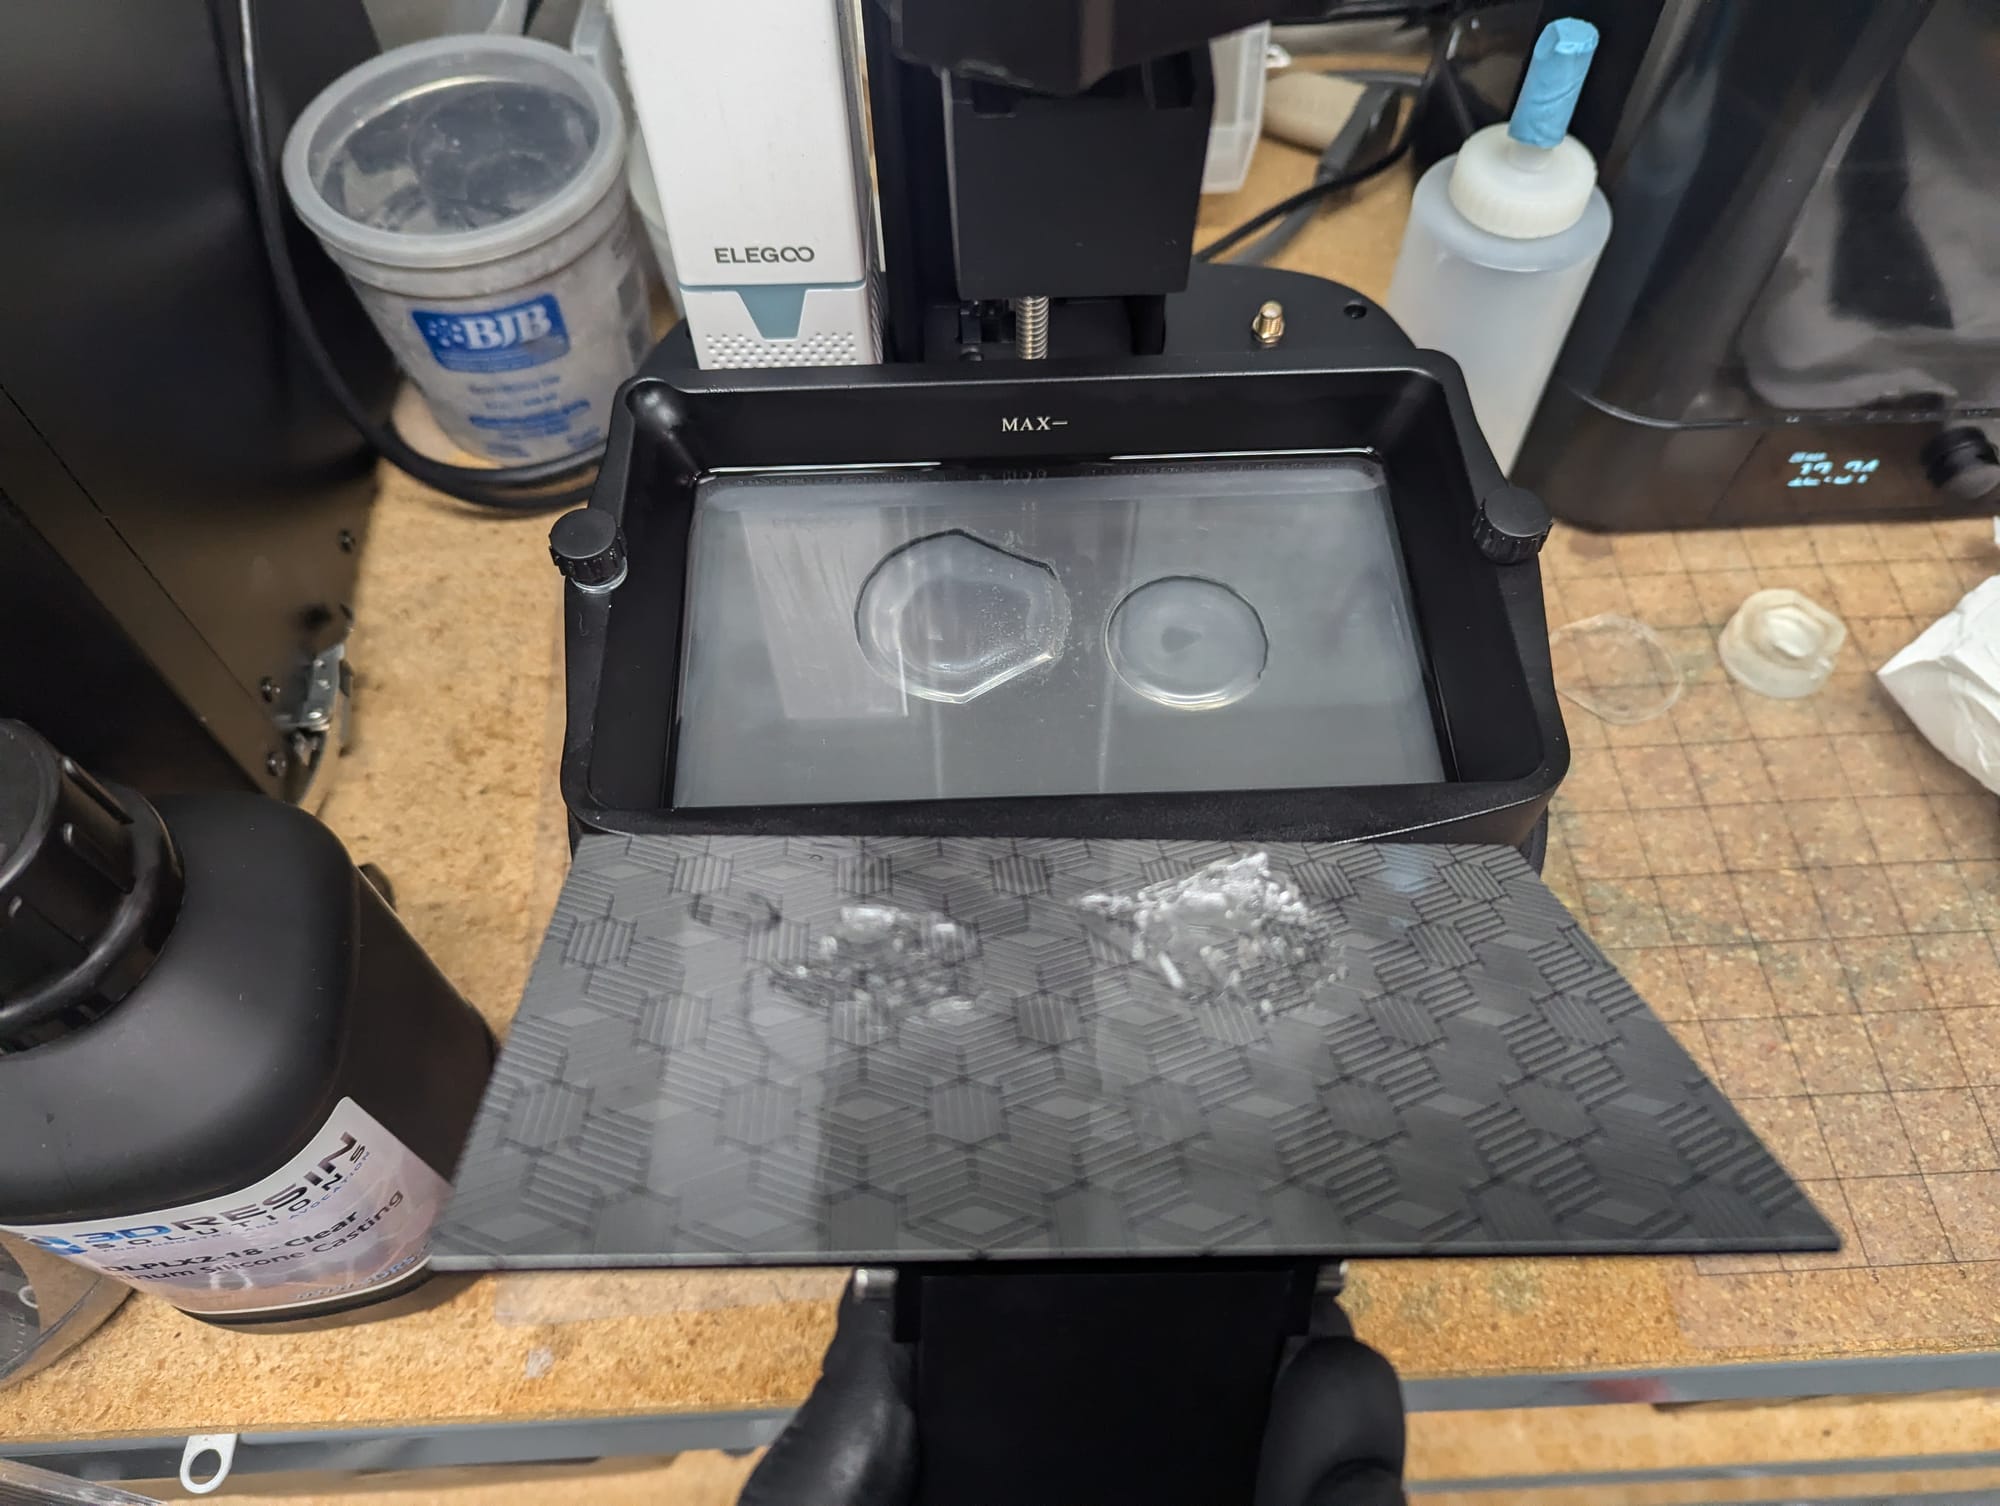
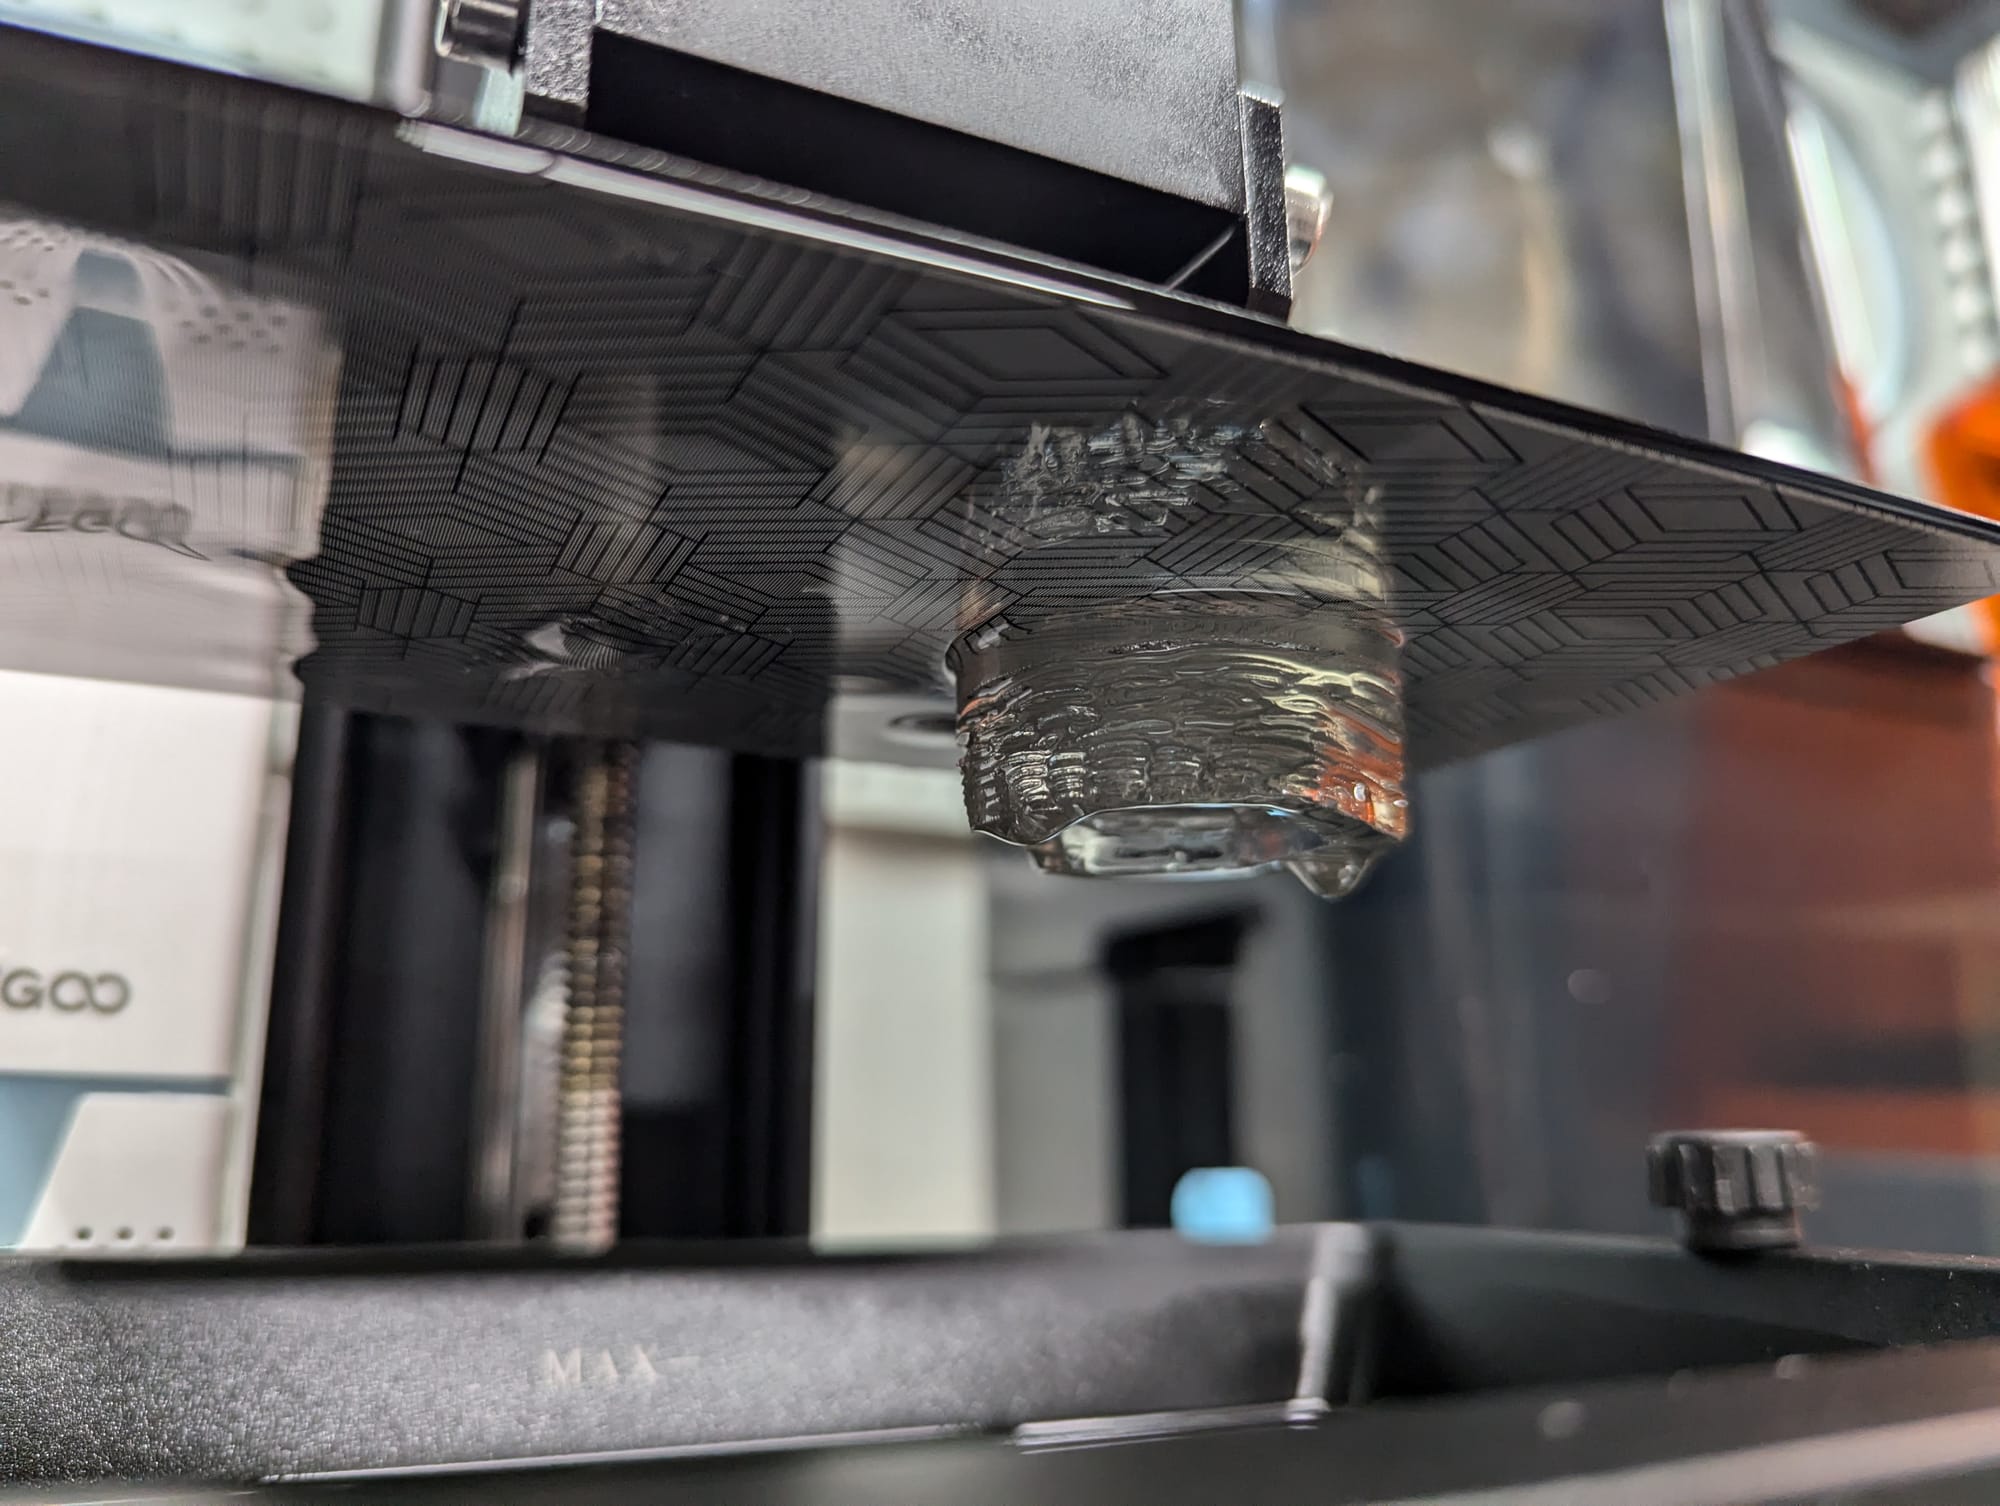
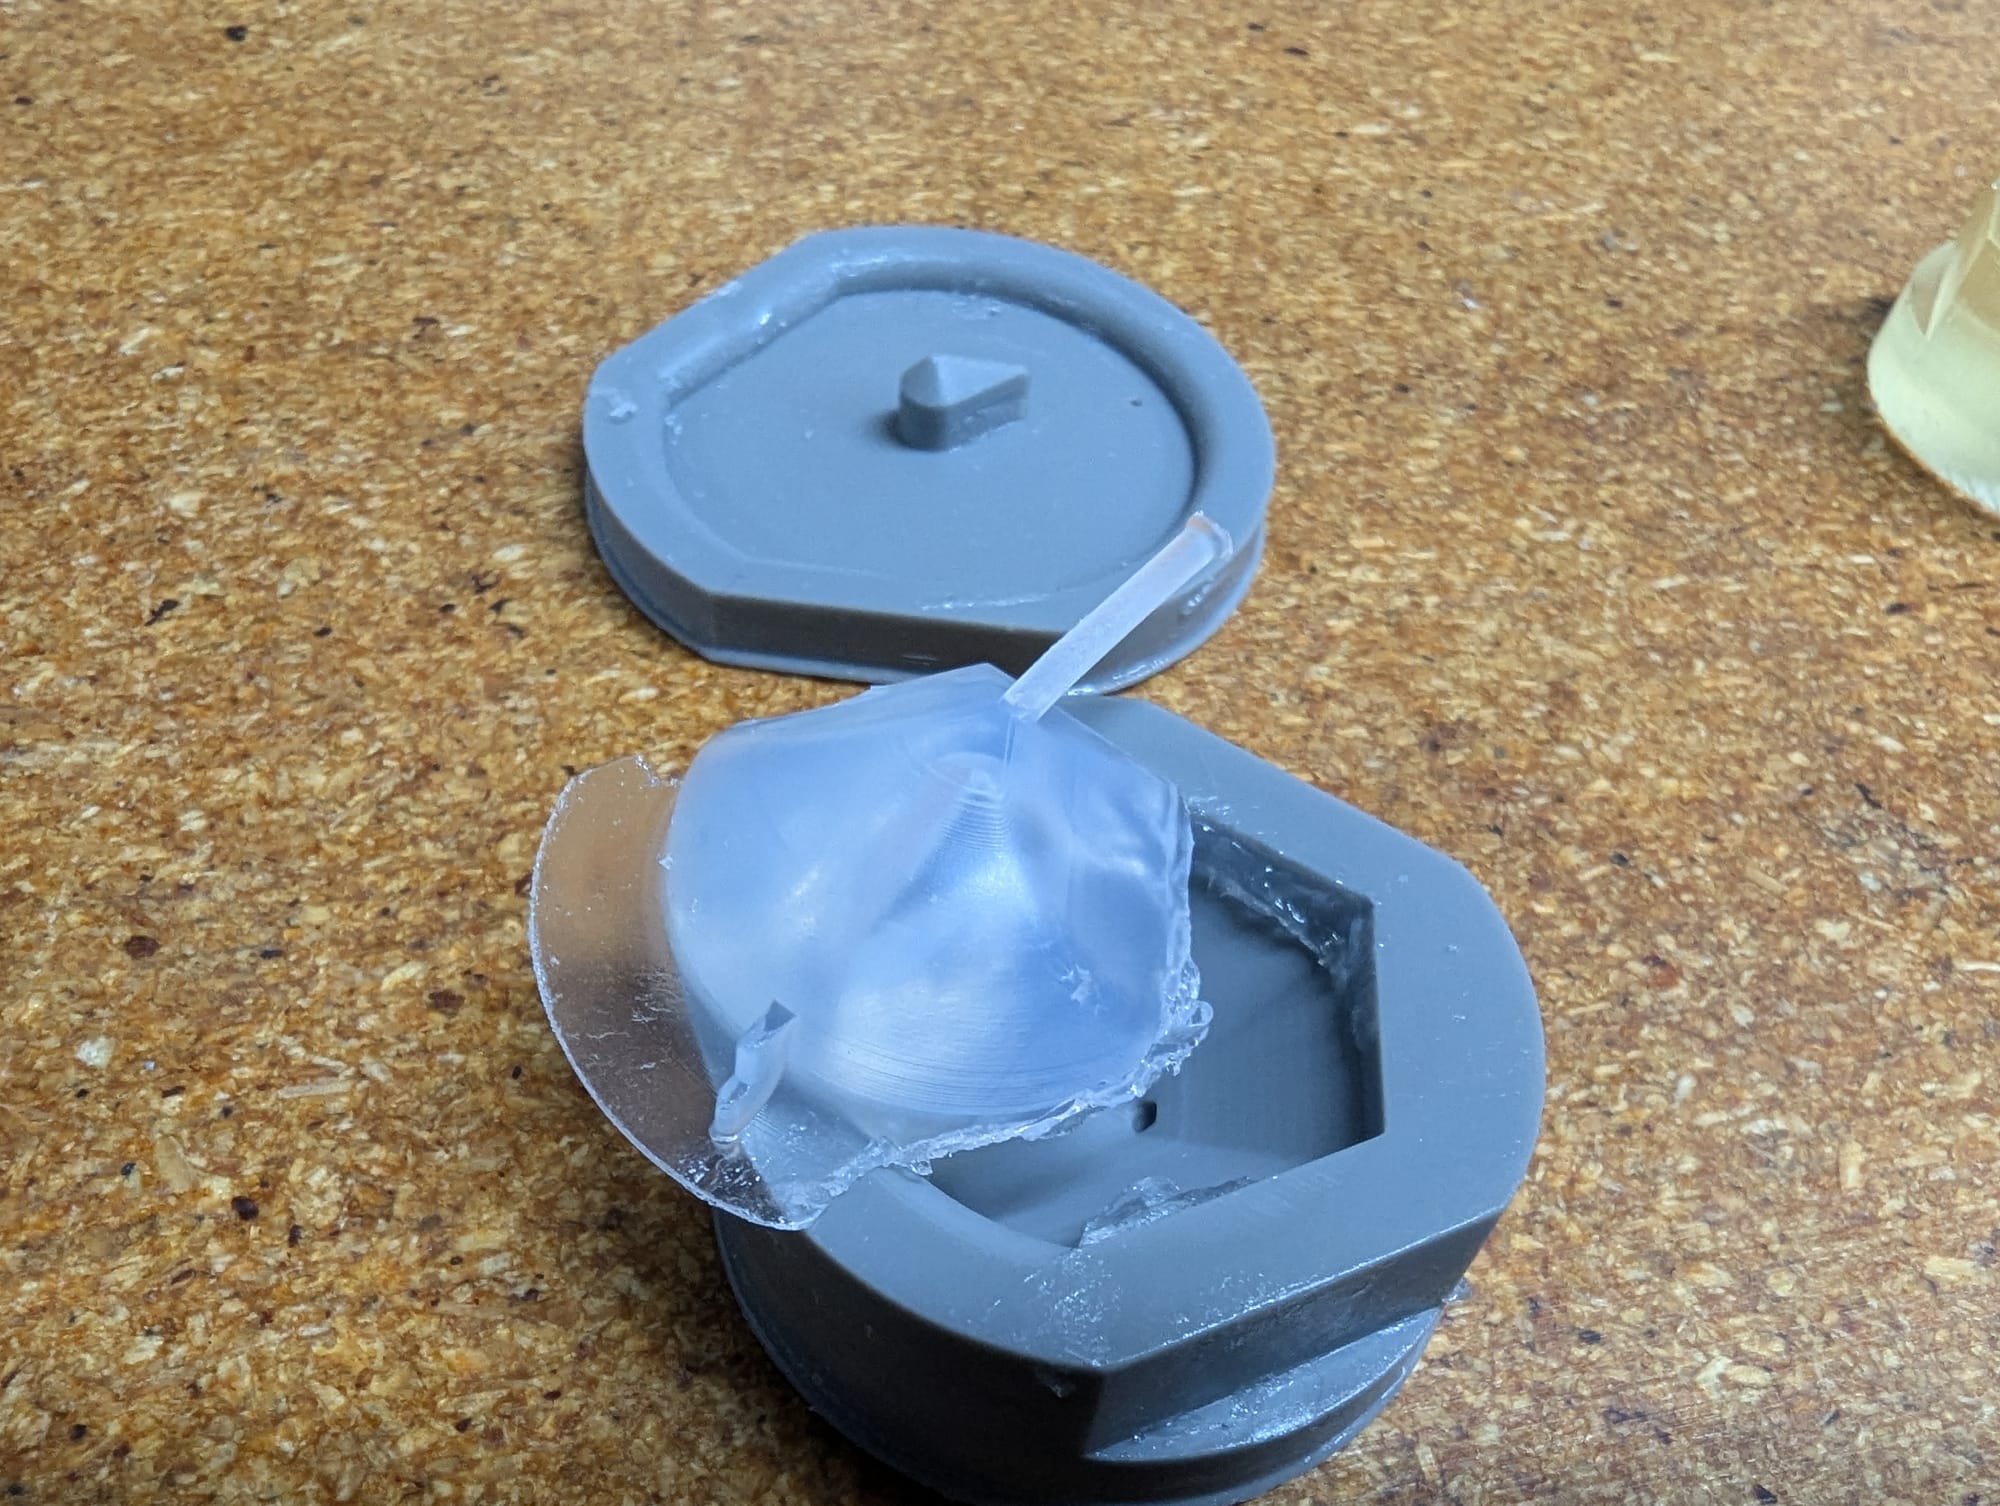
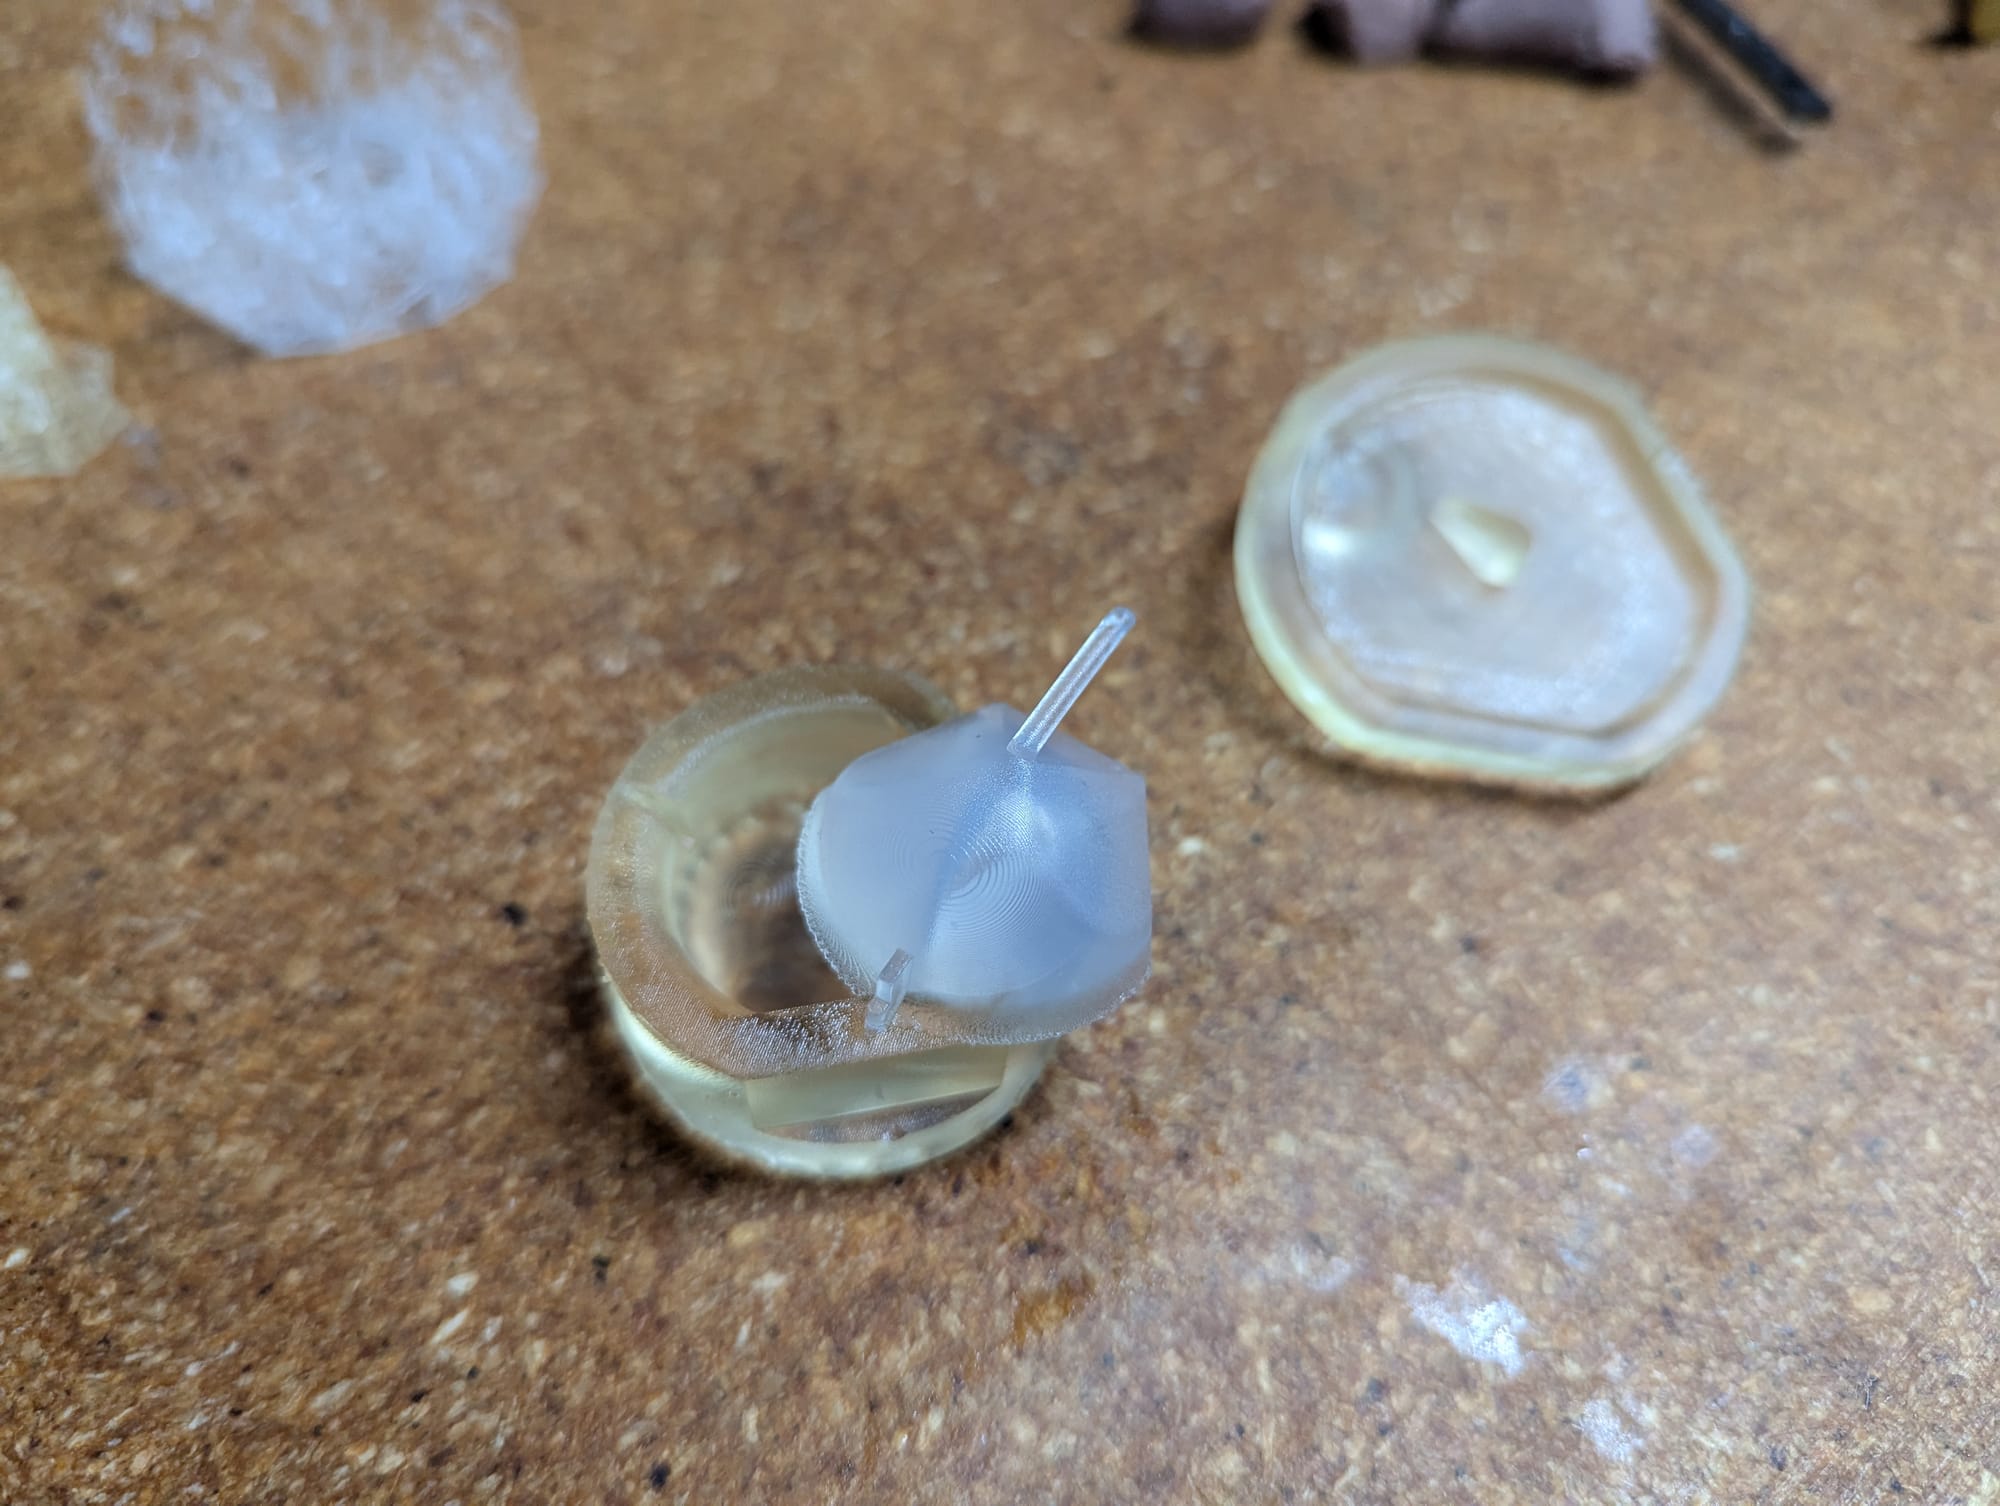
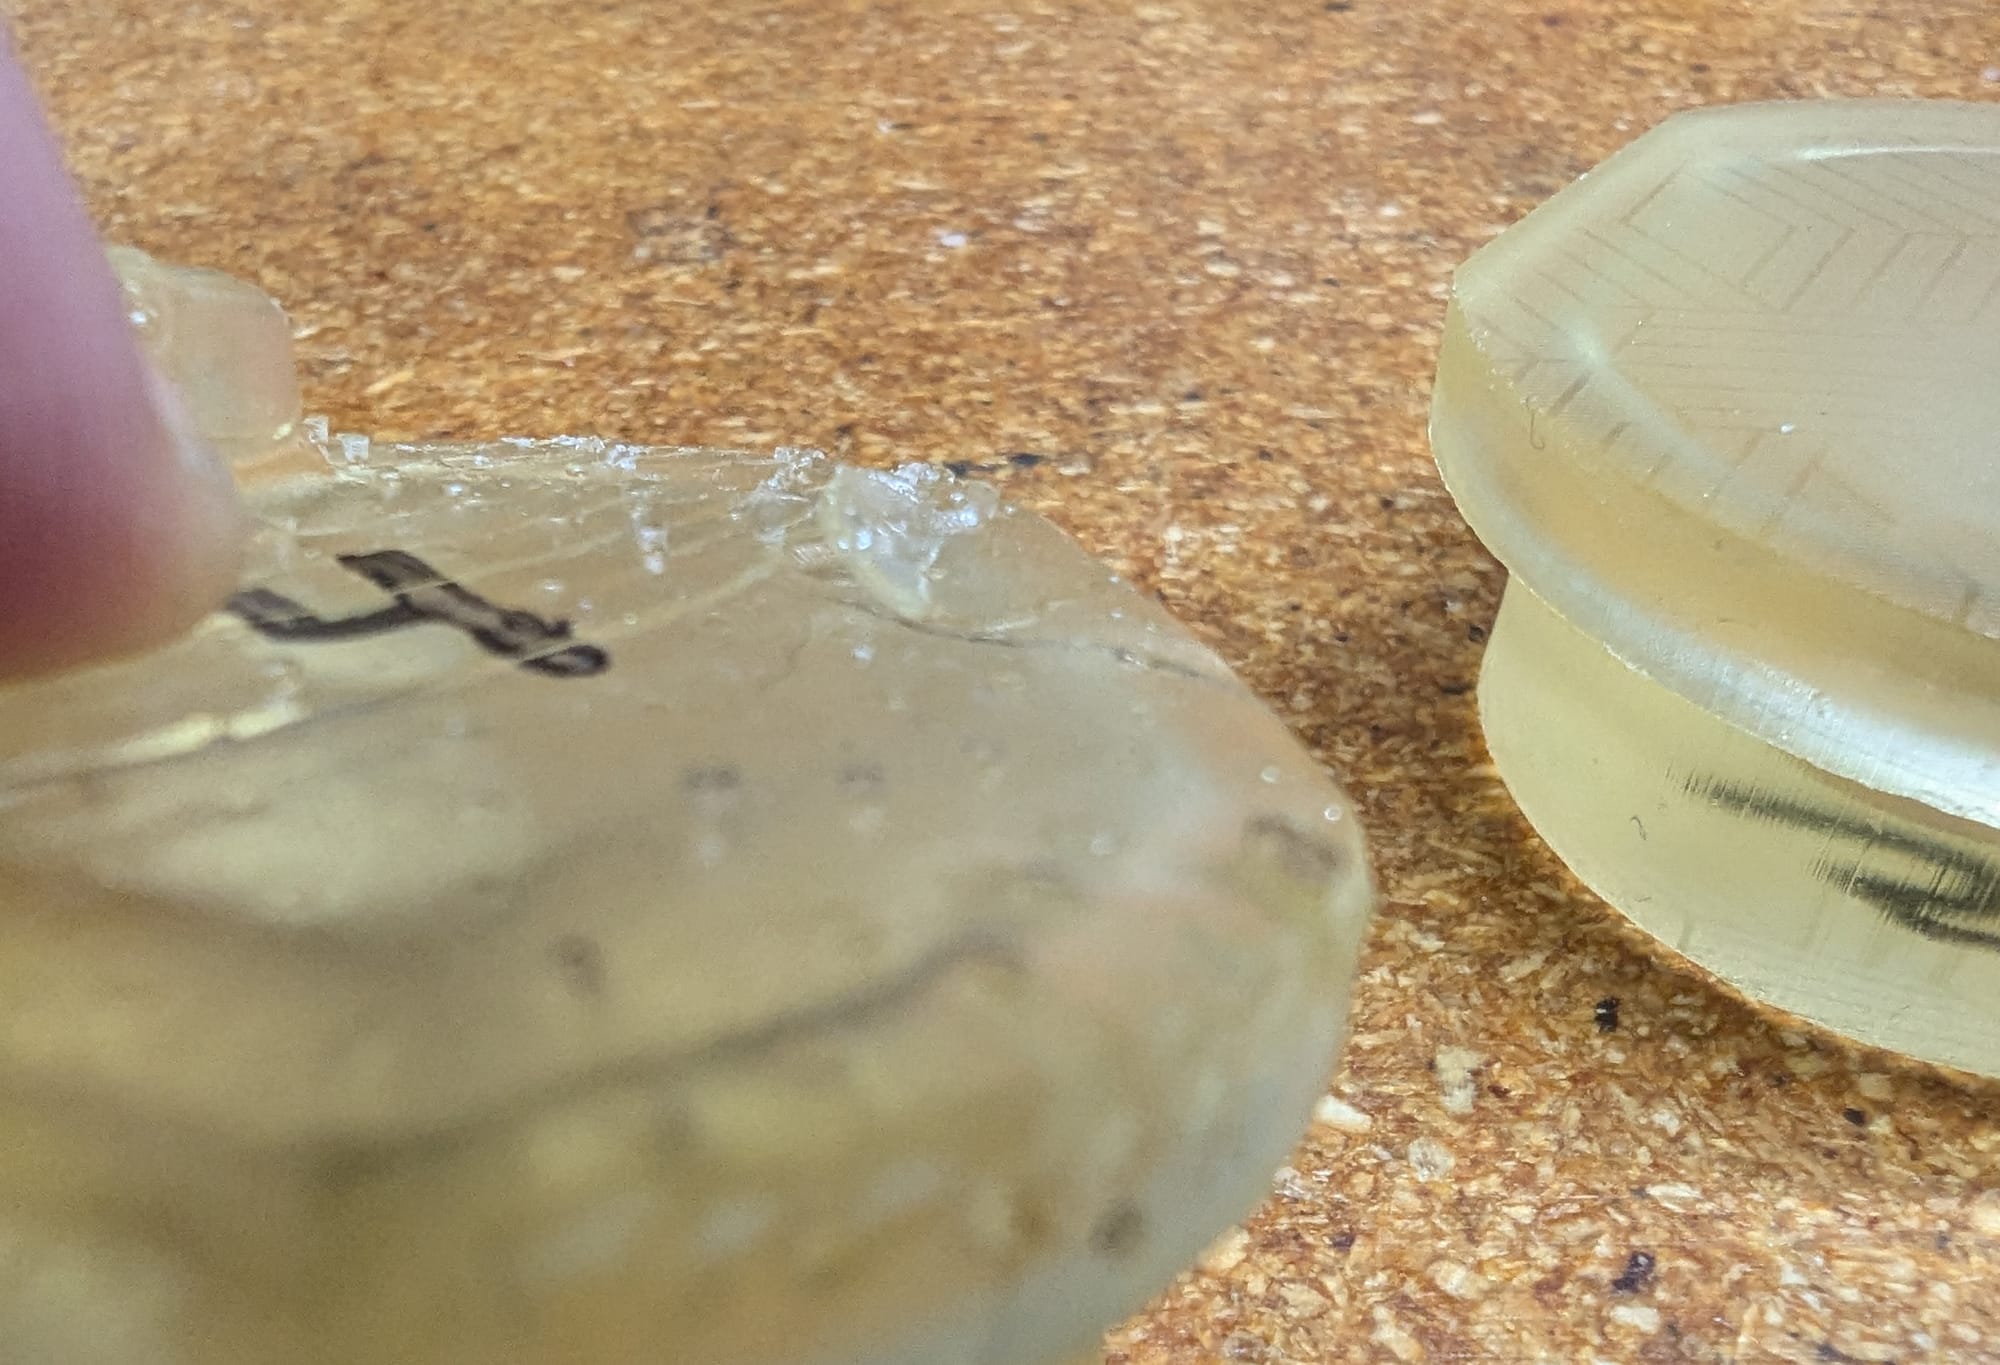
A few of the images of the 4th mold from early in the month is pictured below, and although the last image wont win any prizes, it was enough to help me understand that insufficient drying time between the alcohol washes and post curing operations caused significant cracking. The worst cracking formed on a surface that had irregularities due to normal artefacts left by support structures. You can even see the properly formed equivalent surface of mold 5 to the right, that was printed directly on the build platform without any support structures.
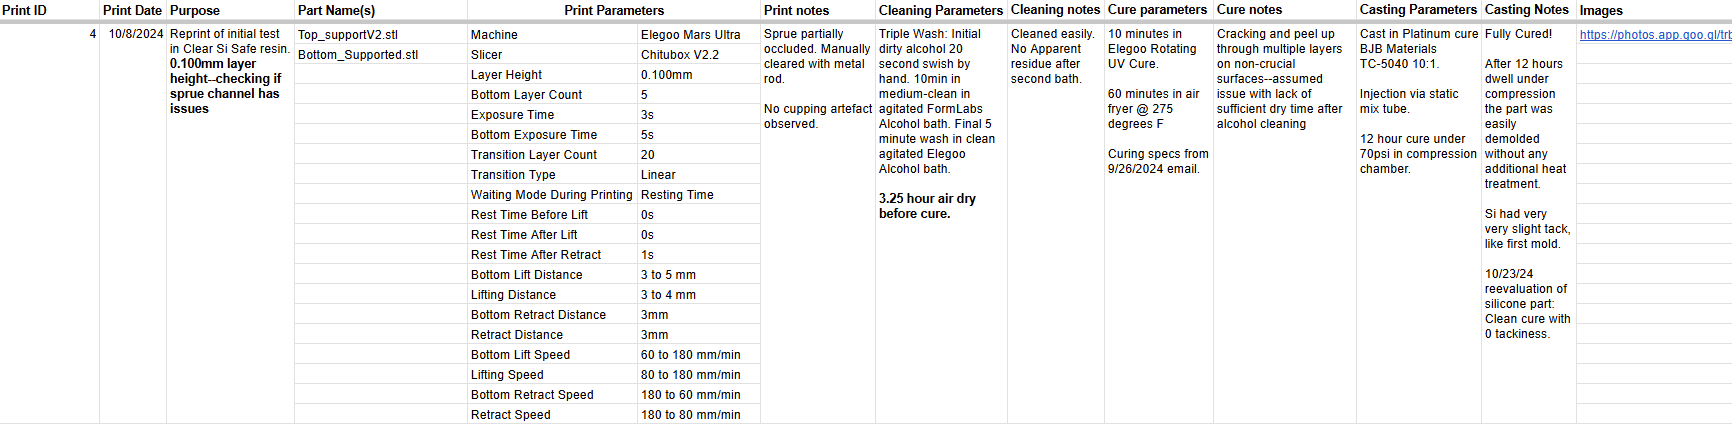
2. Take quick but organized notes. I like making a spreadsheet with a set of categories to record the parameters used, and notes of my observations. This always feels like a chore to me and I never want to take the 2 to 10 minute break to record, but it is always useful. As you record you get the side benefit of remembering subtle details you may have otherwise overlooked or not connected to a pattern. Also, when there is a tedious level of detail, and or many iterations I always forget important things. I still dislike documenting, but I've come to count on the process and have found it saves repeated tests. An example of documentation of the mold above (including a link to the google album with any associated images/videos) is pictured below.
A few general notes on it's properties:
-Cured material can soften and plastically deform when heated (this can be significant when the mold is heated to speed silicone cure time).
-Cured material is not brittle and can be cleanly drilled and reamed.
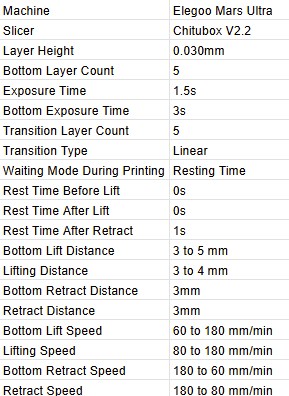
The best parameters I have found for printing this resin is below, however, there is room for improvement.
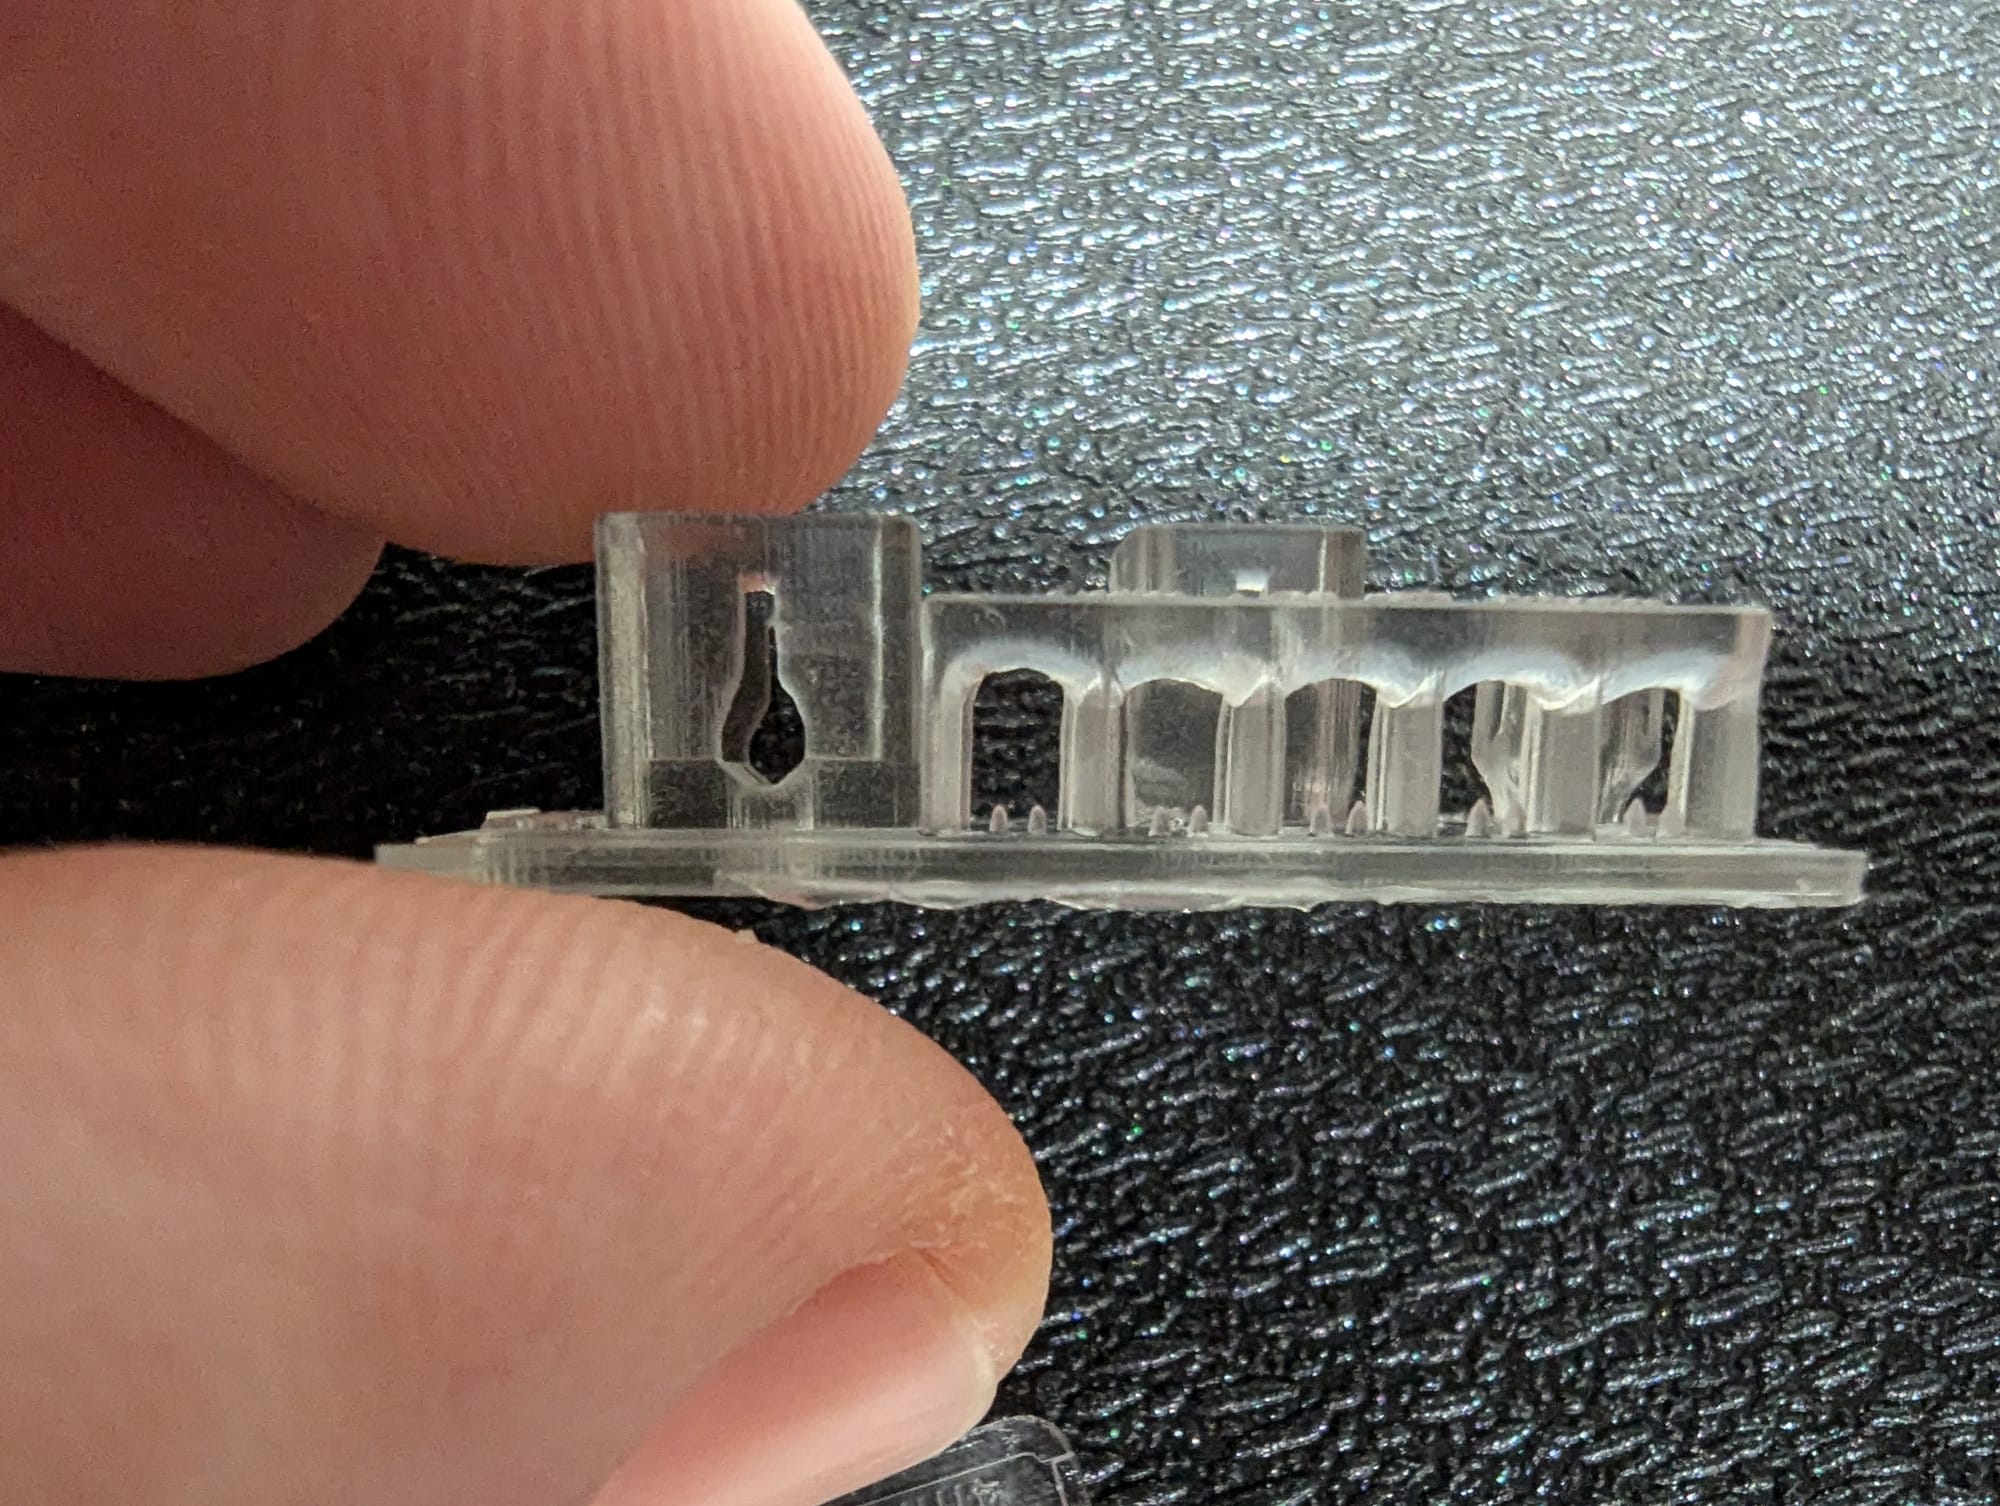
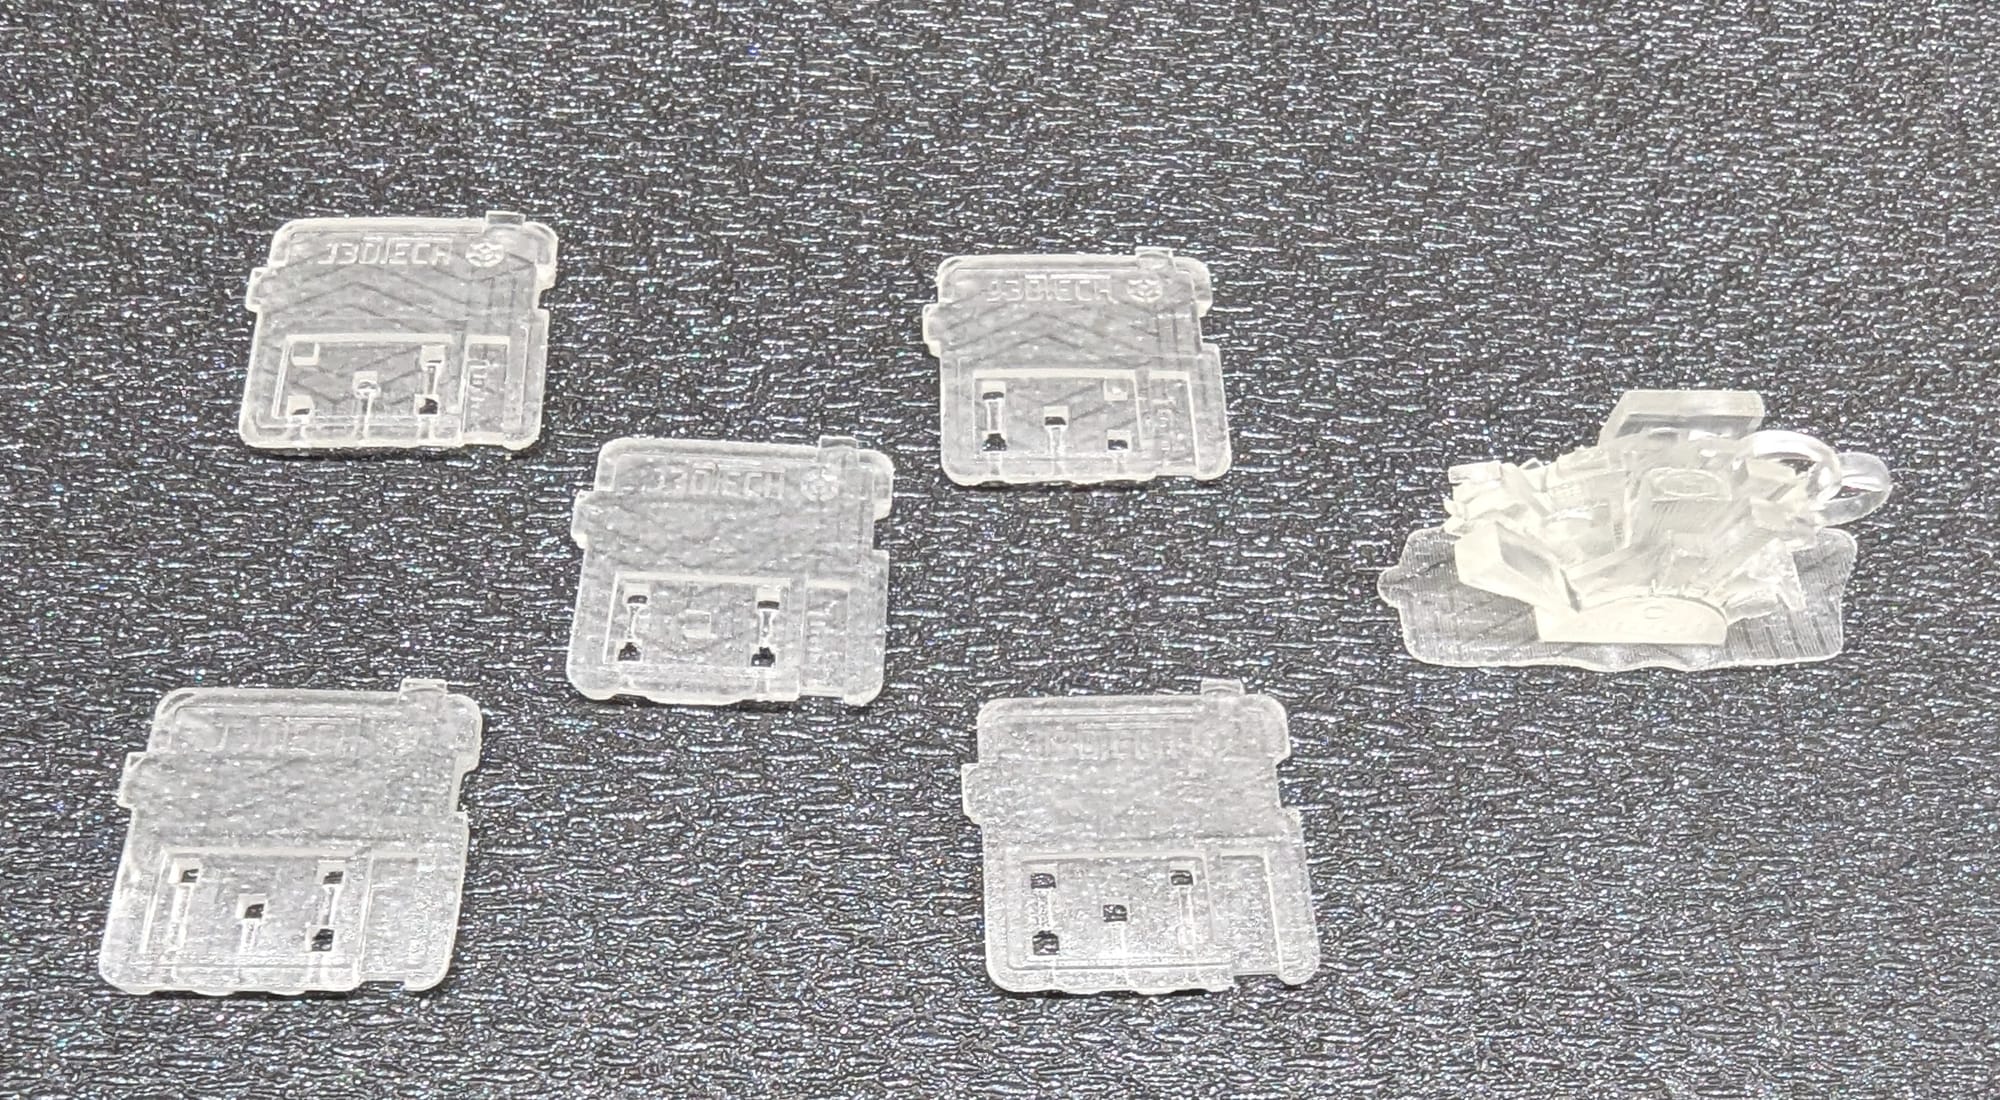
I have specifically found that there is a sensitivity to small columns (1mm or less in diameter), and a significant sensitivity to cupping.
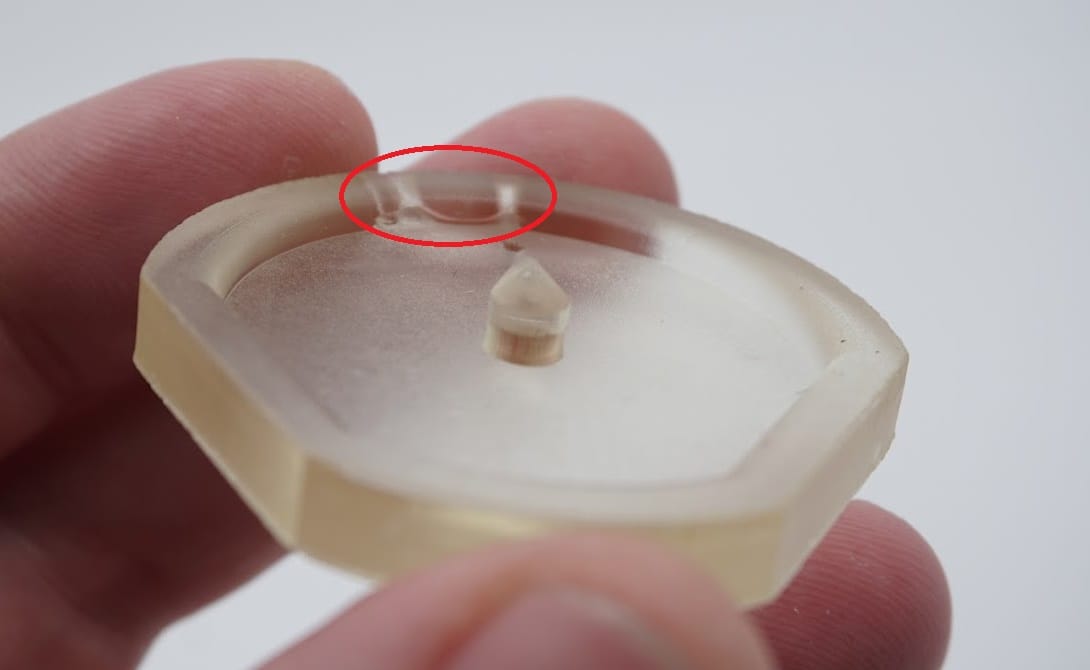
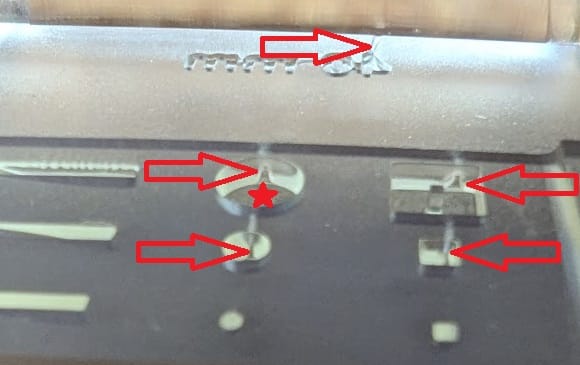
Red circle and arrows point out cupping blowout, and the star show where a 1mm diameter column didn't print.
I can offer a recommendation for this guide from J3D-Tech--it was clear and thorough, and provided links to downloadable STL files I found very useful for calibrating my printer and dialing in the resin printing parameters. User-friendly documentation like this is something I love most in dedicated opensource and maker communities.
As mentioned earlier, a big tip for those considering cast silicones (or urethanes): BJB Materials is THE BEST material vendor I have found in my 6 years in the business of silicone (and urethane) casting. They've got exceptional products and knowledgeable, kind customer service. Lots of people know SmoothOn, I've got nothing against SmoothOn and have used their products (InhibitX is the one product of theirs that continue to use). However, my experience with the BJB team and their materials is on another level!
My big learning this month, in addition to gaining experience tweaking the back end parameters of stereolithographic printing, is how smooth a project can move when working with knowledgeable, experienced collaborators with strong communication skills. Craig at 3DRS was an exceptional professional to work with. Not only that, he brought the strong team in his business designing the formulation and mixing it up the resins I had the pleasure to use! The two qualities I most value in professional collaborators are:
- A depth of knowledge, grounded in real experience.
- Clear communication (which I find often has a positive correlation with good project management skills).